


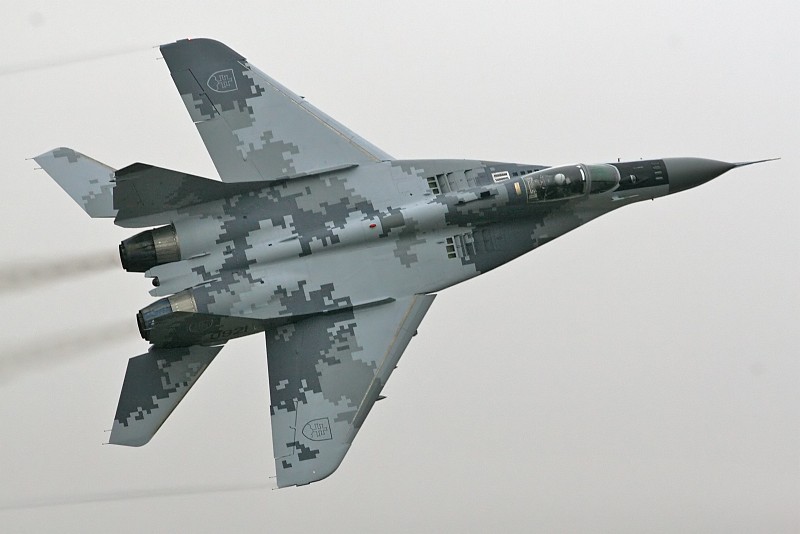
Slovak Air Force MiG-29 with 2008 Digital Camoflage, 1/48
I am failing to find words to describe this very beautiful 1/48 scale model, but this one is simply very special for me. First reason is that as a Slovak national, it was very enjoyable to be able to build this majestic plane. Second reason is that I was able to finally incorporate proper pre-shading technique along with manually painted (with painfully detailed masking) of the digital camouflage pattern this plane uses. The painting of this one actually took me two weeks of work every evening (yes, I have full time job, so that is the best I can have). Because this plane is so special for me , I will also make this article a little bit different as well. So this time it will not be only a simple few picture gallery, but I will actually go a little bit over the construction right after that.
MiG-29AS in Slovak Air Force
(super quick history)

The Mikoyan MiG-29 (Russian: Микоян МиГ-29; NATO reporting name: “Fulcrum“) is a fourth-generation jet fighter aircraft designed in the Soviet Union. Developed by the Mikoyan design bureau as an air superiority fighter during the 1970s, the MiG-29, along with the larger Sukhoi Su-27, was developed to counter new American fighters such as the McDonnell Douglas F-15 Eagle, and the General Dynamics F-16 Fighting Falcon. The MiG-29 entered service with the Soviet Air Force in 1983.
– from wikipedia.org
You can also read a little about MiG-29AS in Slovak Air Force deployment on wikipedia here. But in summary the MiG-29 were deployed to Czechoslovakia Air Force in the 1980s, and when the Czechoslovakia divided (peacefully!) to Czech Republic and Slovak Republic (Slovakia in short), the 20 original MiG-29s were divided equally to both countries.
The MiG-29AS that I modeled is a modernized version with new avionics and electronic IFF that was standardized for service in NATO forces since Slovakia is part of NATO since 2004.
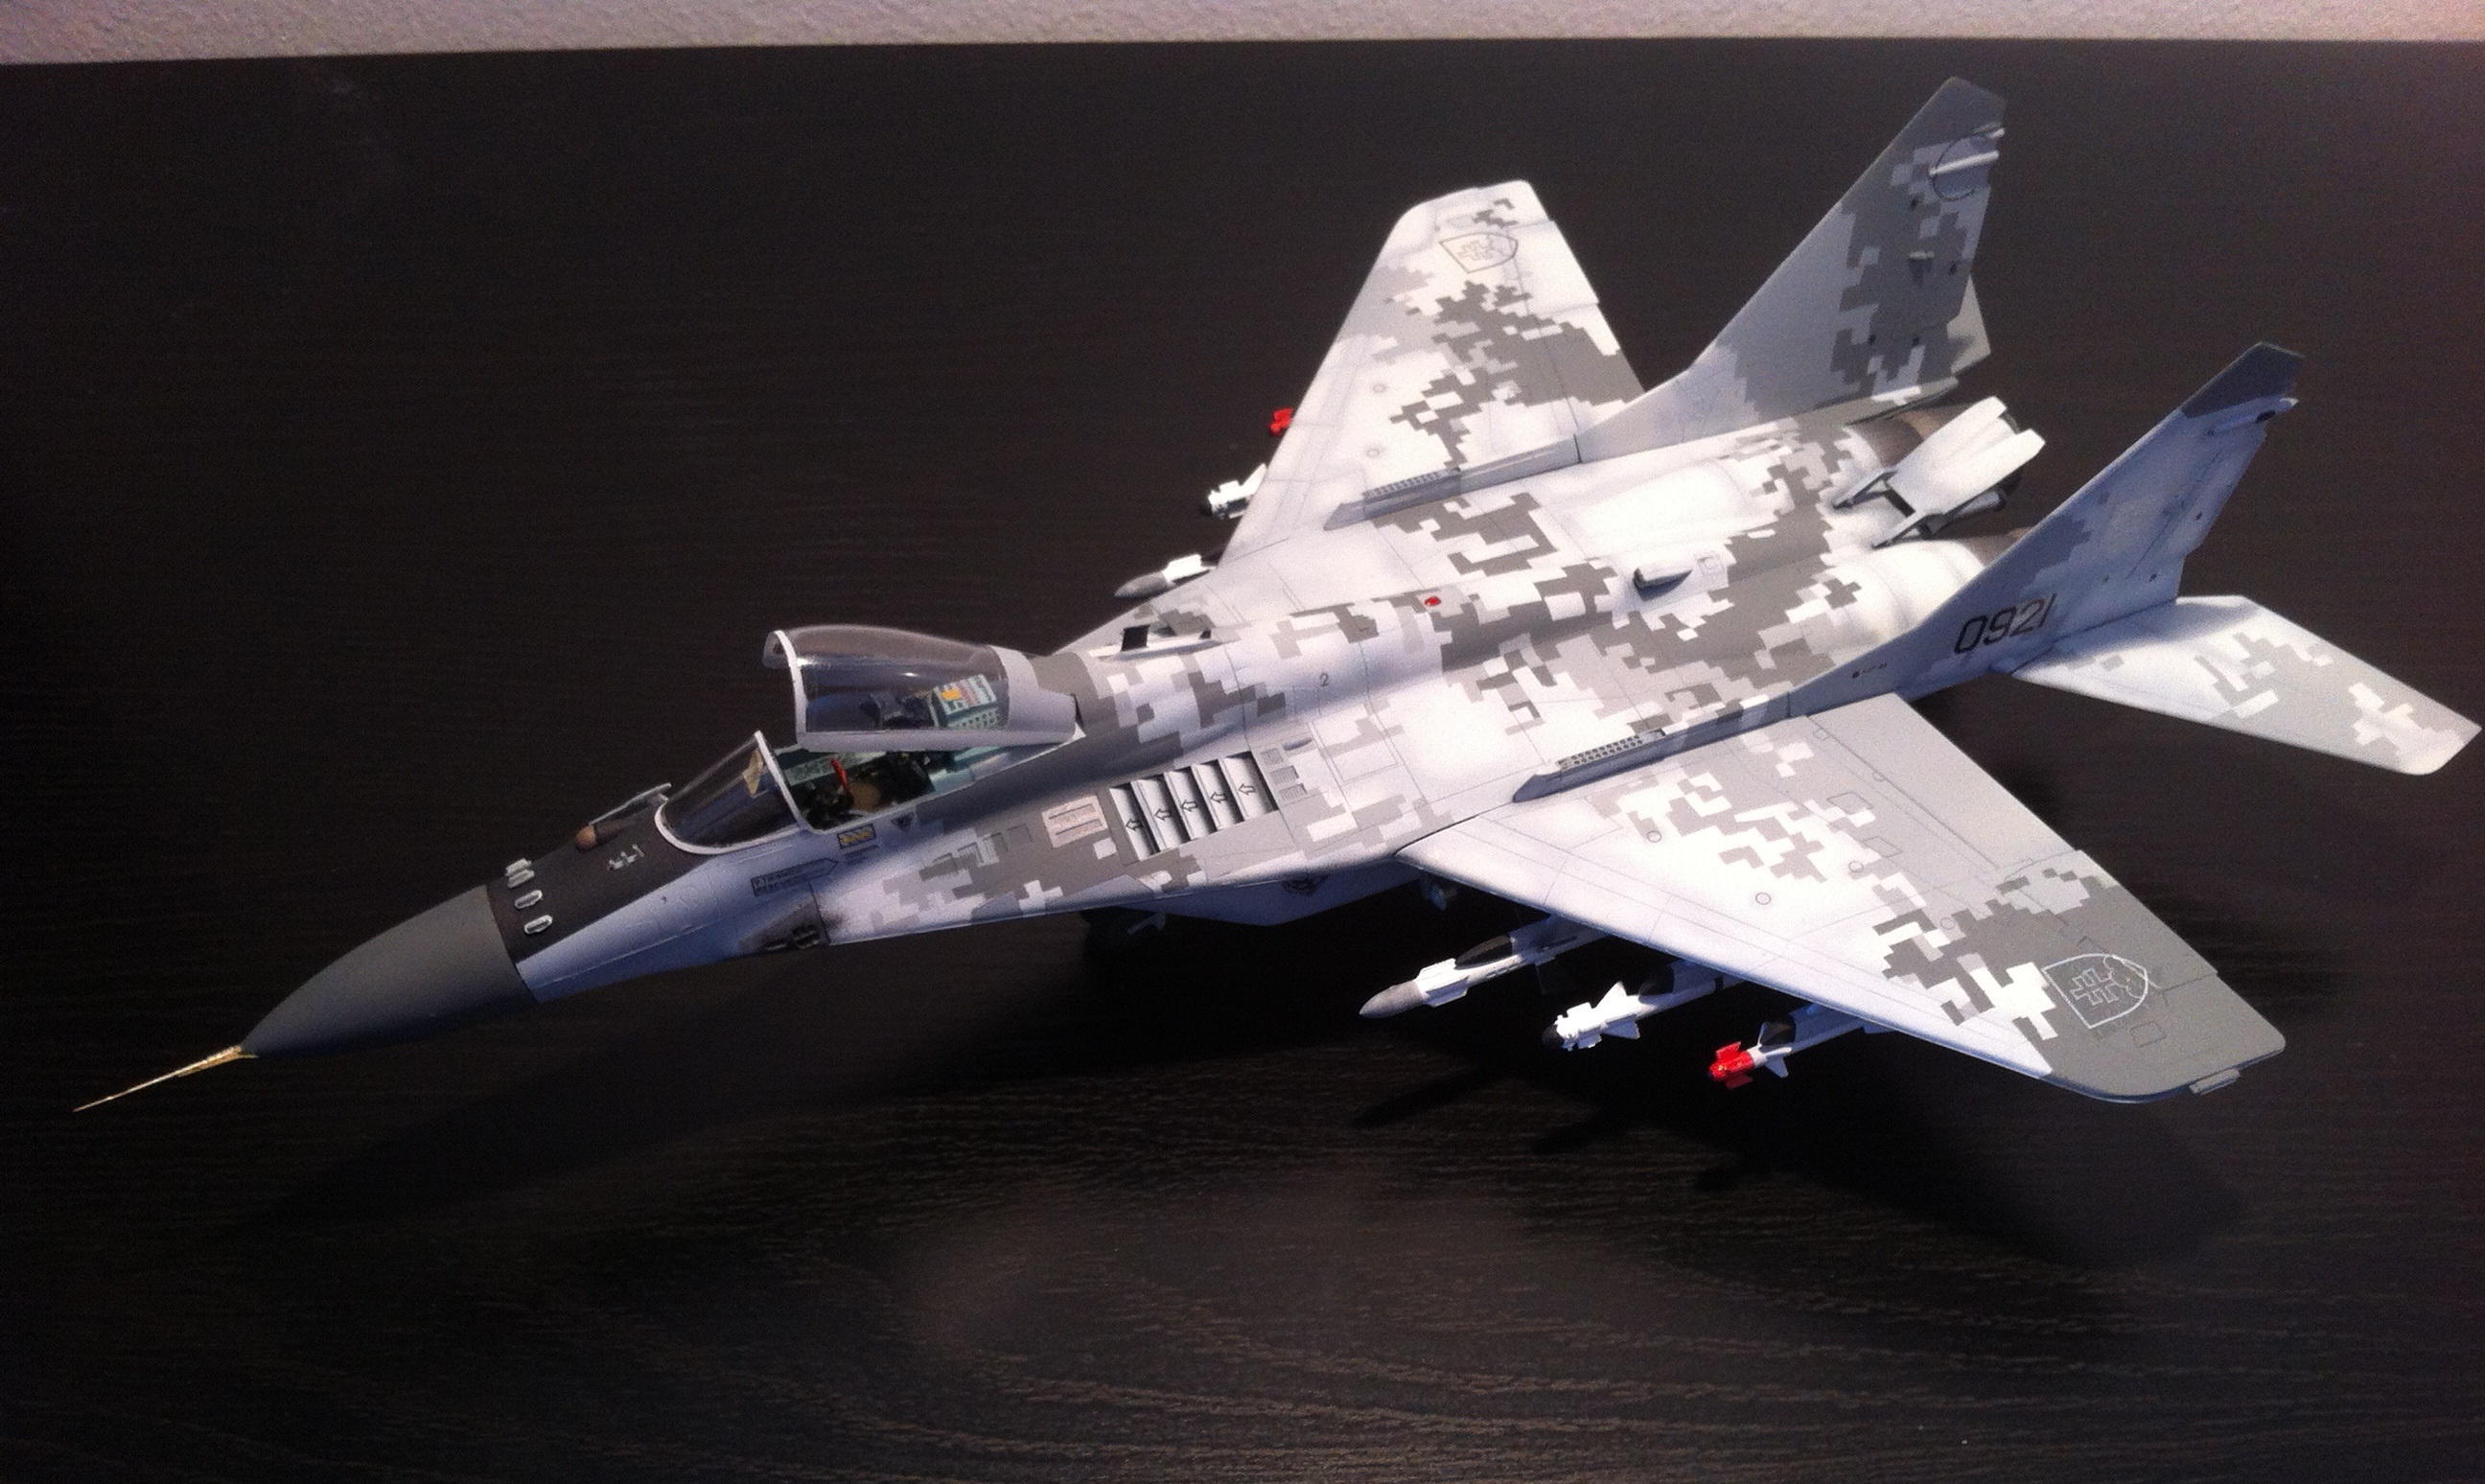
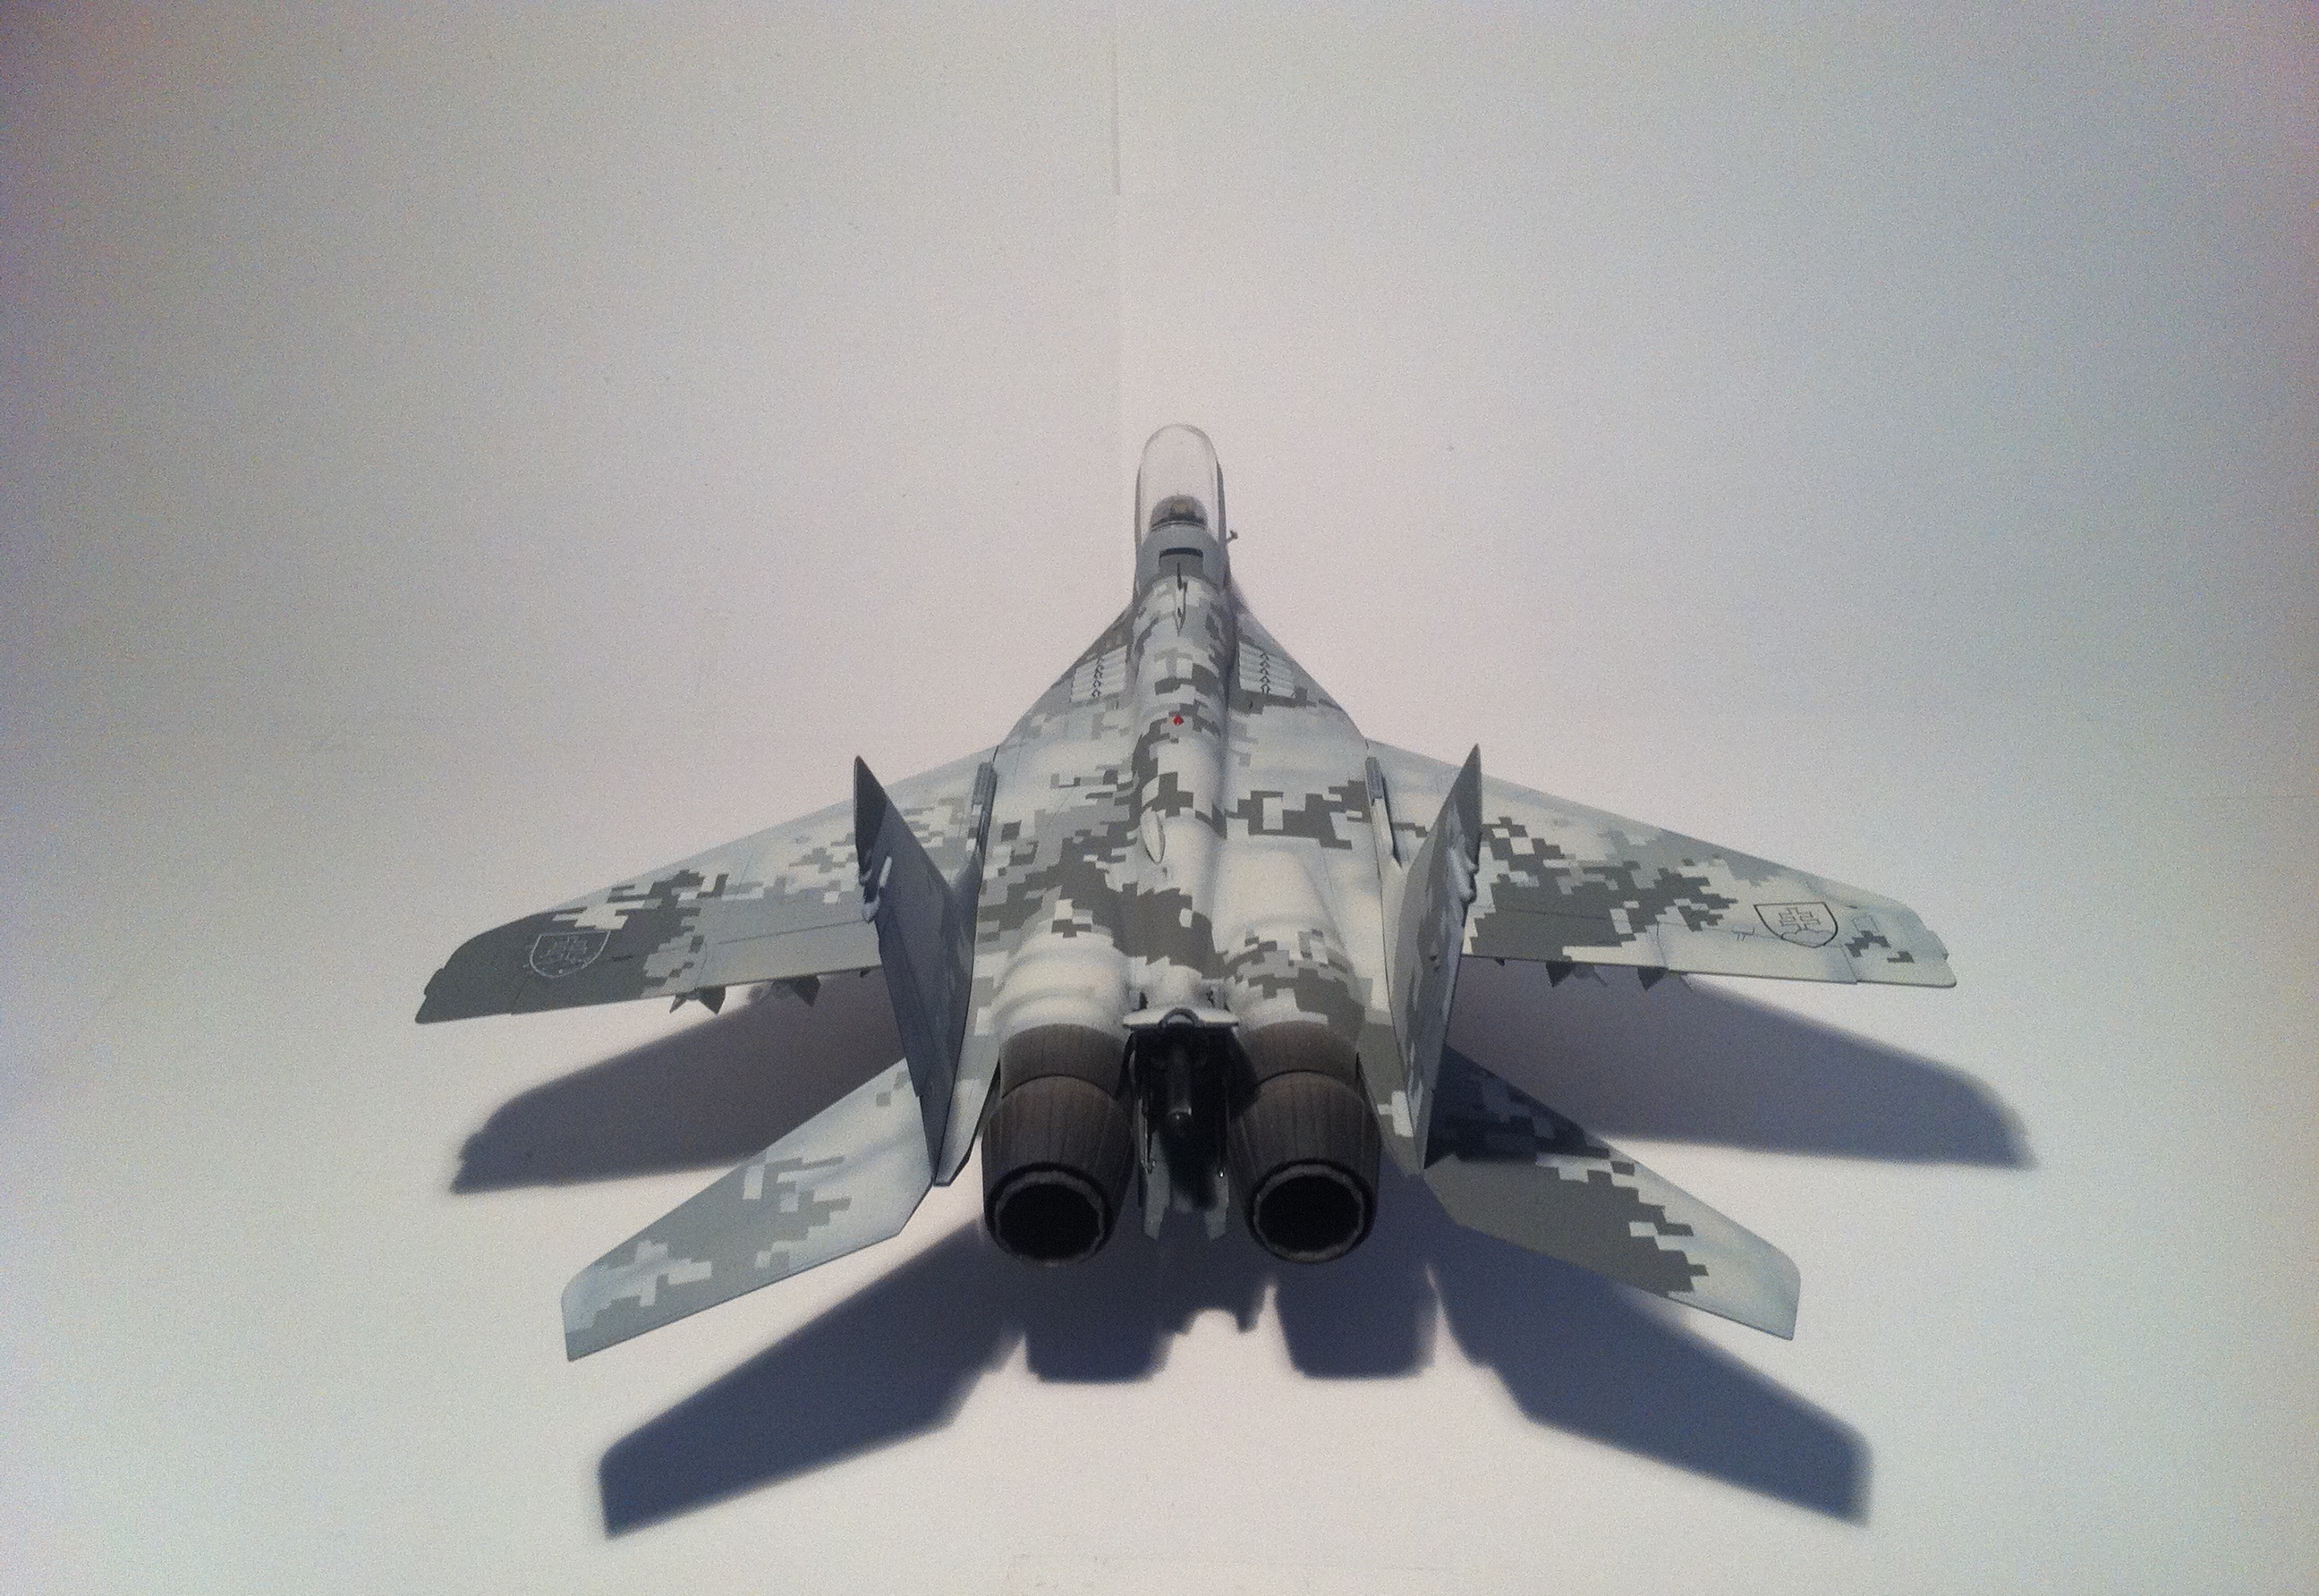
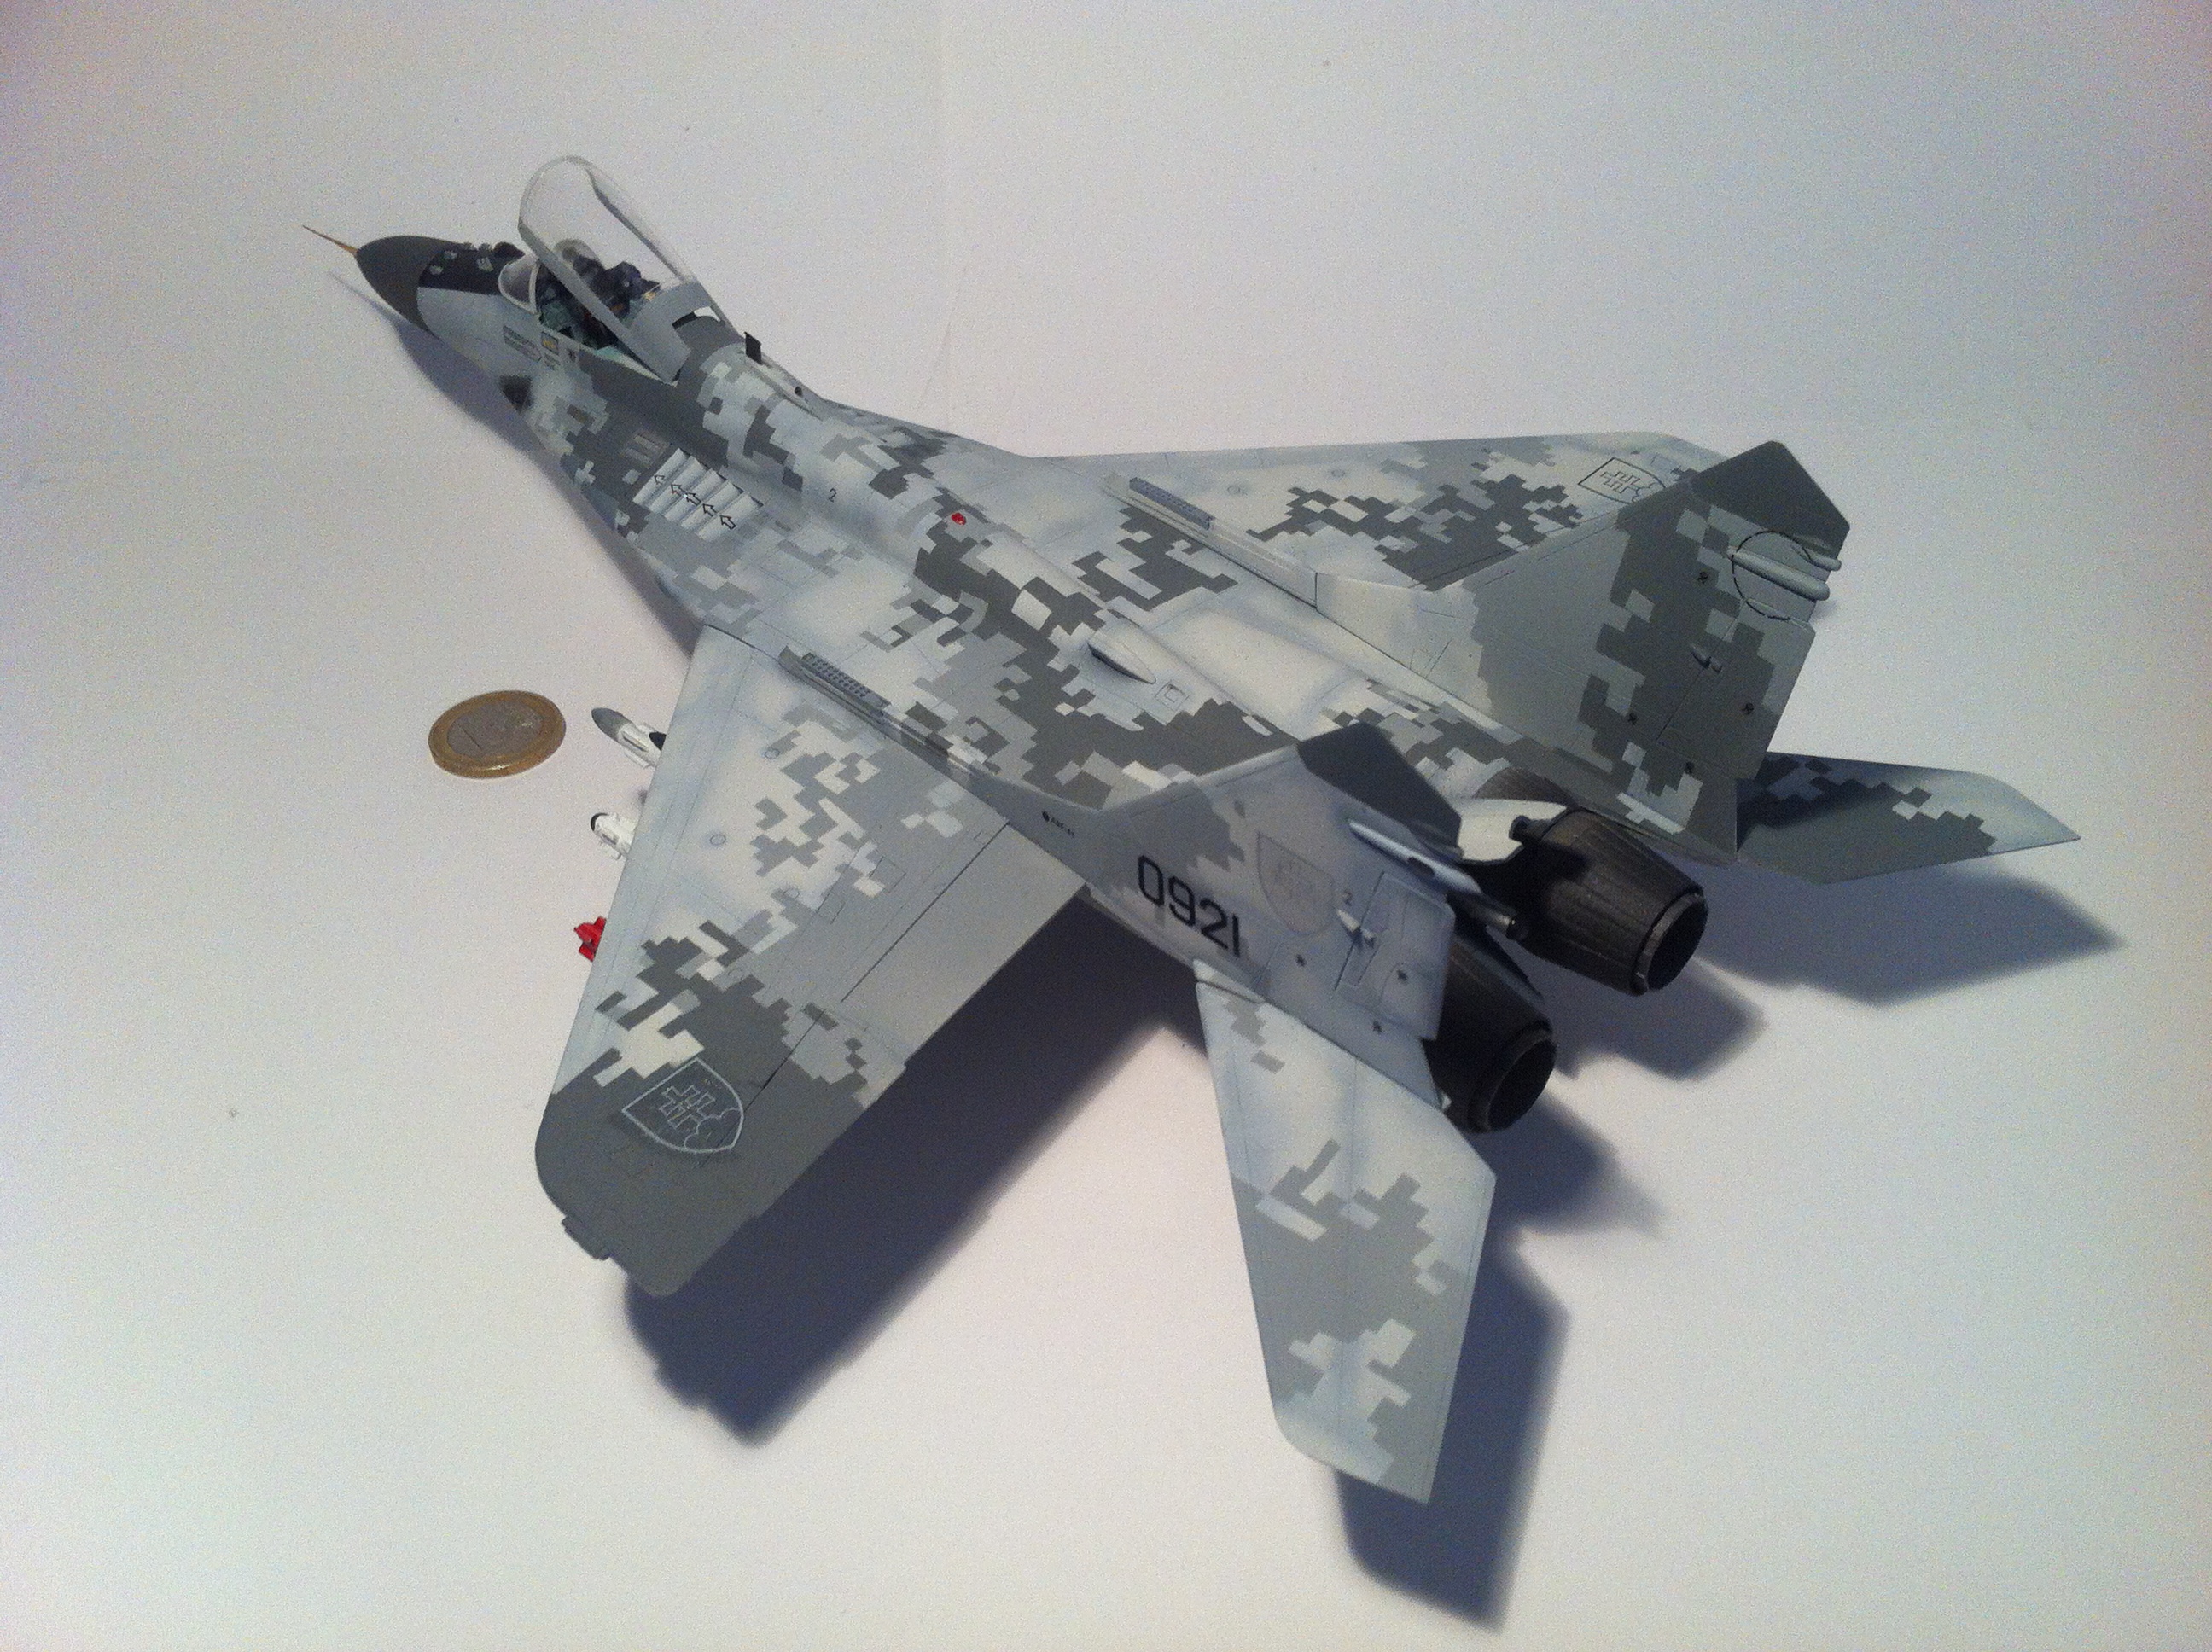
The Digital Camouflage that is the biggest “wow” for the model, the real plane was painted with it in 2007 as part of the modernization. Specifically the aircraft #0921 was painted in December 2007 as part of an upgrade to MiG-29AS standard in spectacular digital pattern created by Canadian civilian research enterprise. Camouflage pattern is named Digital Thunder™, developed in 2006 by the design team of Dr. Timothy R. O’Neill and Guy Cramer from HyperStealth Biotechnology Corp., Maple Ridge, BC, Canada.
Contents of Article
Gallery:
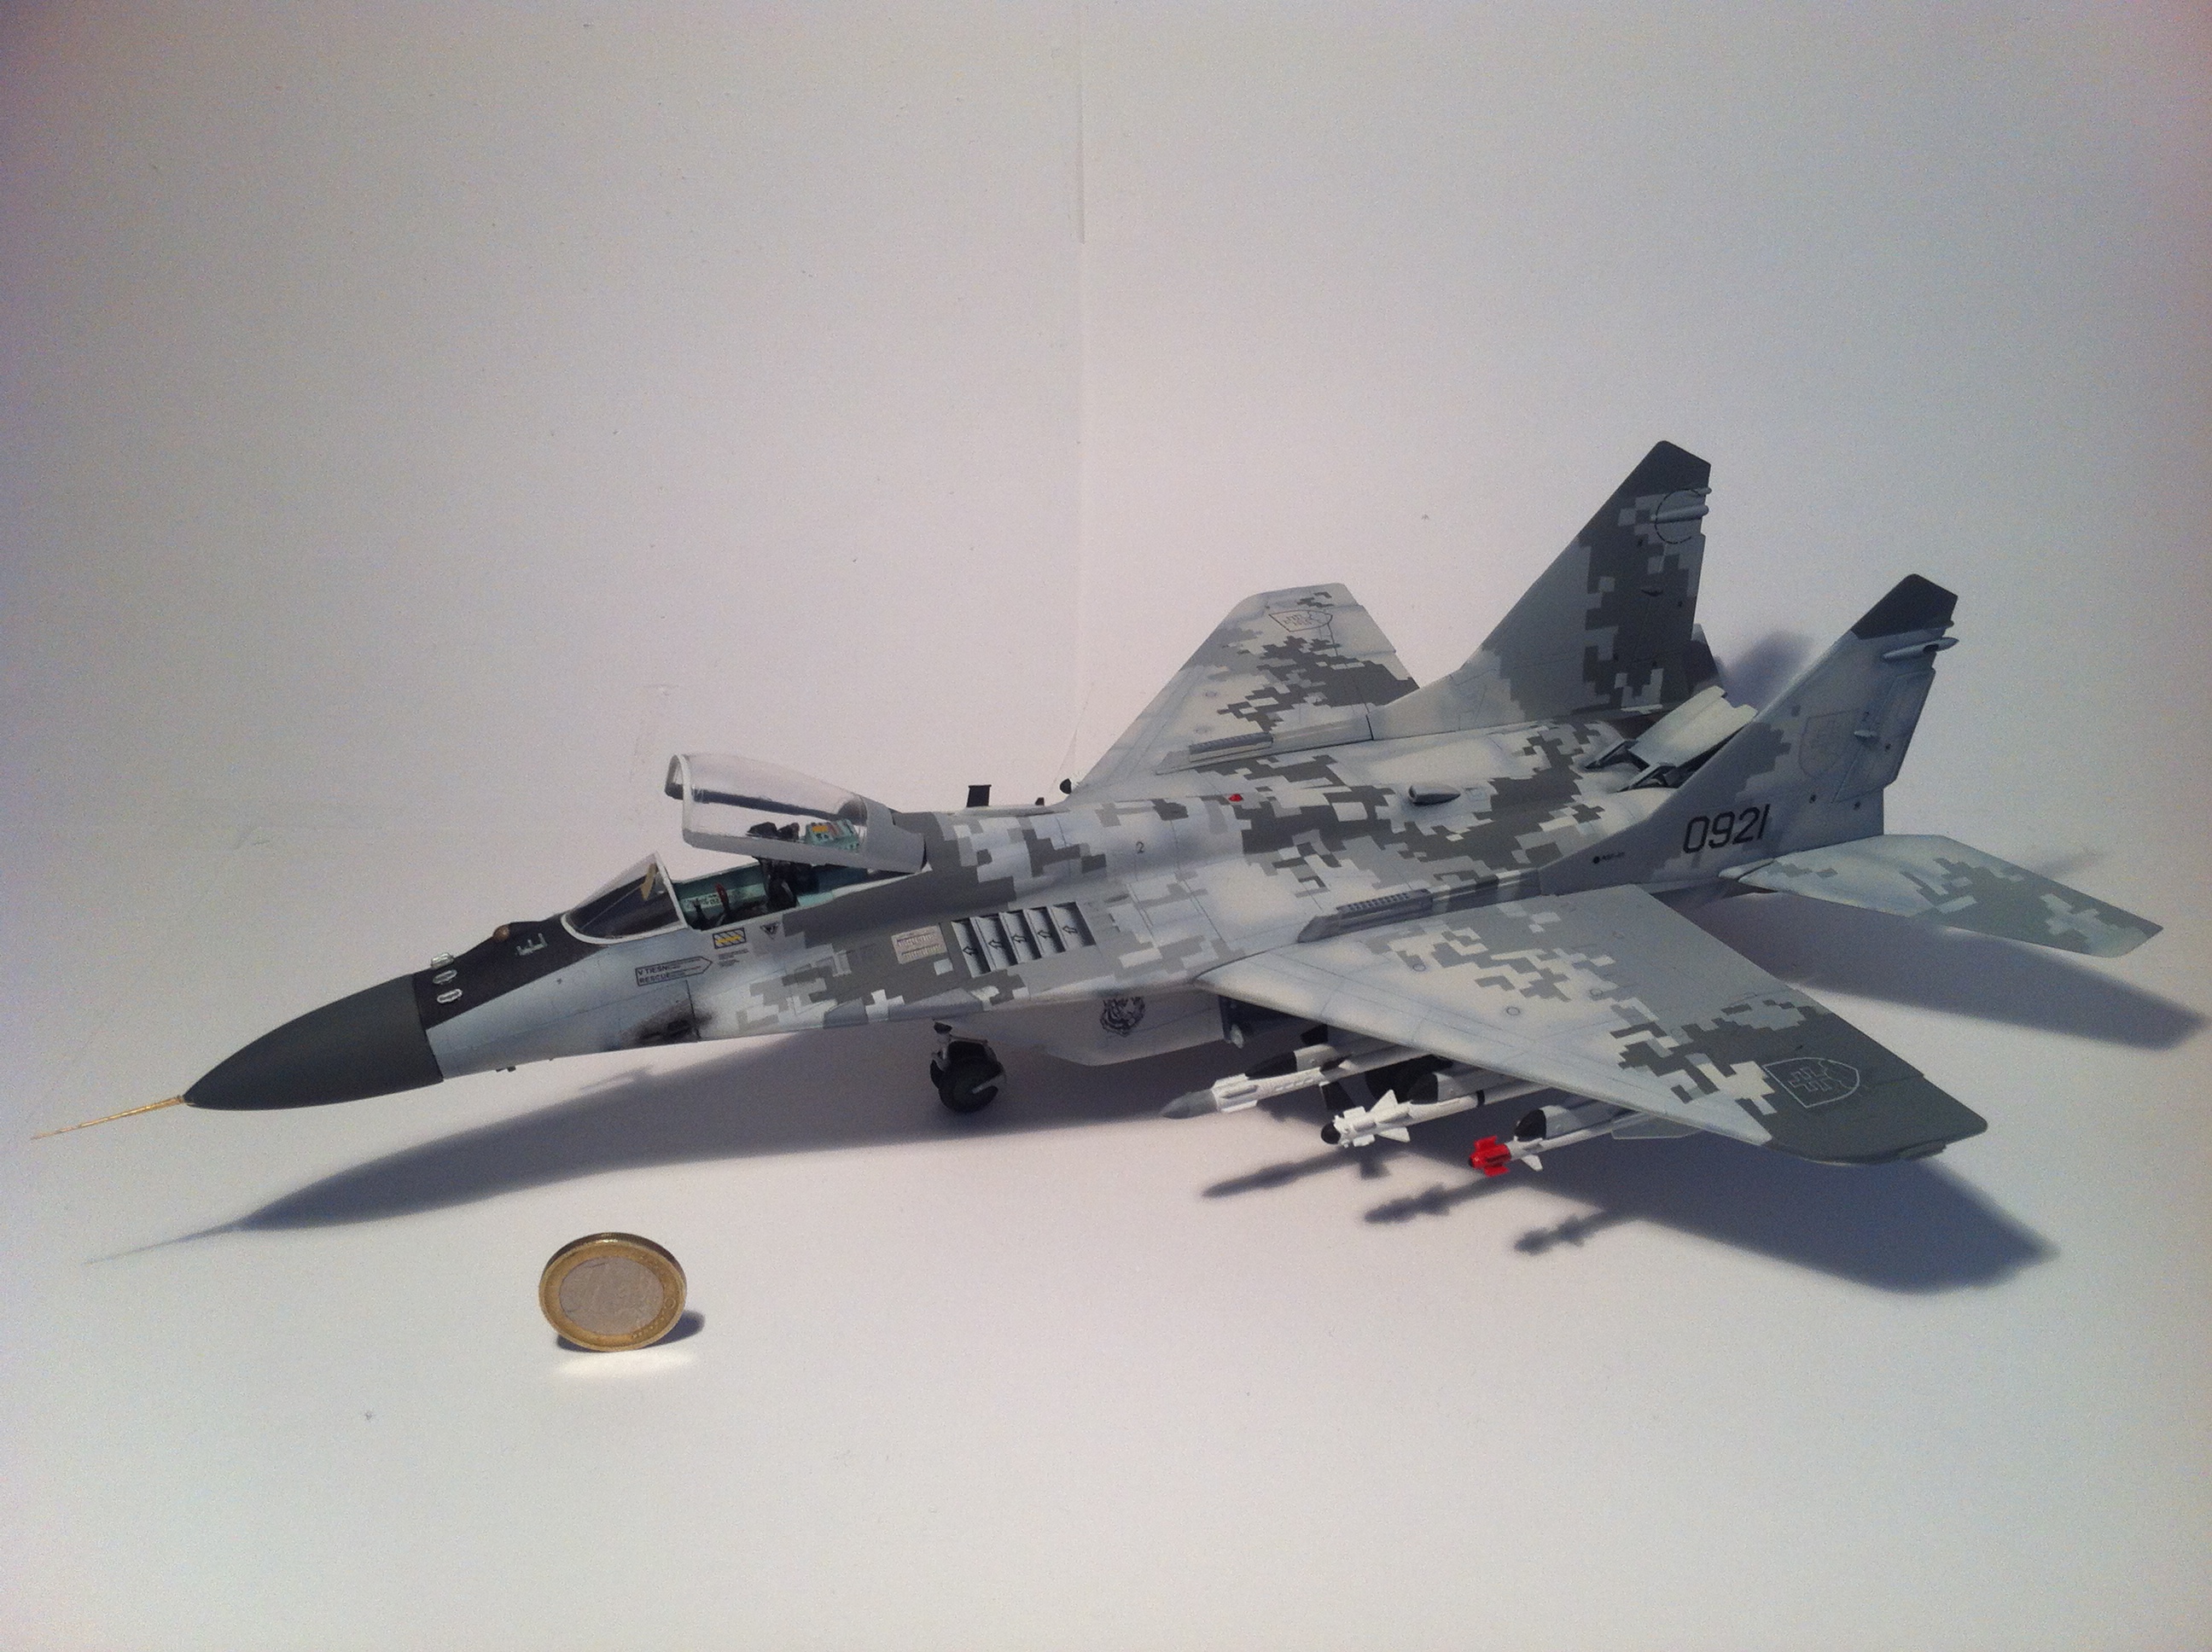
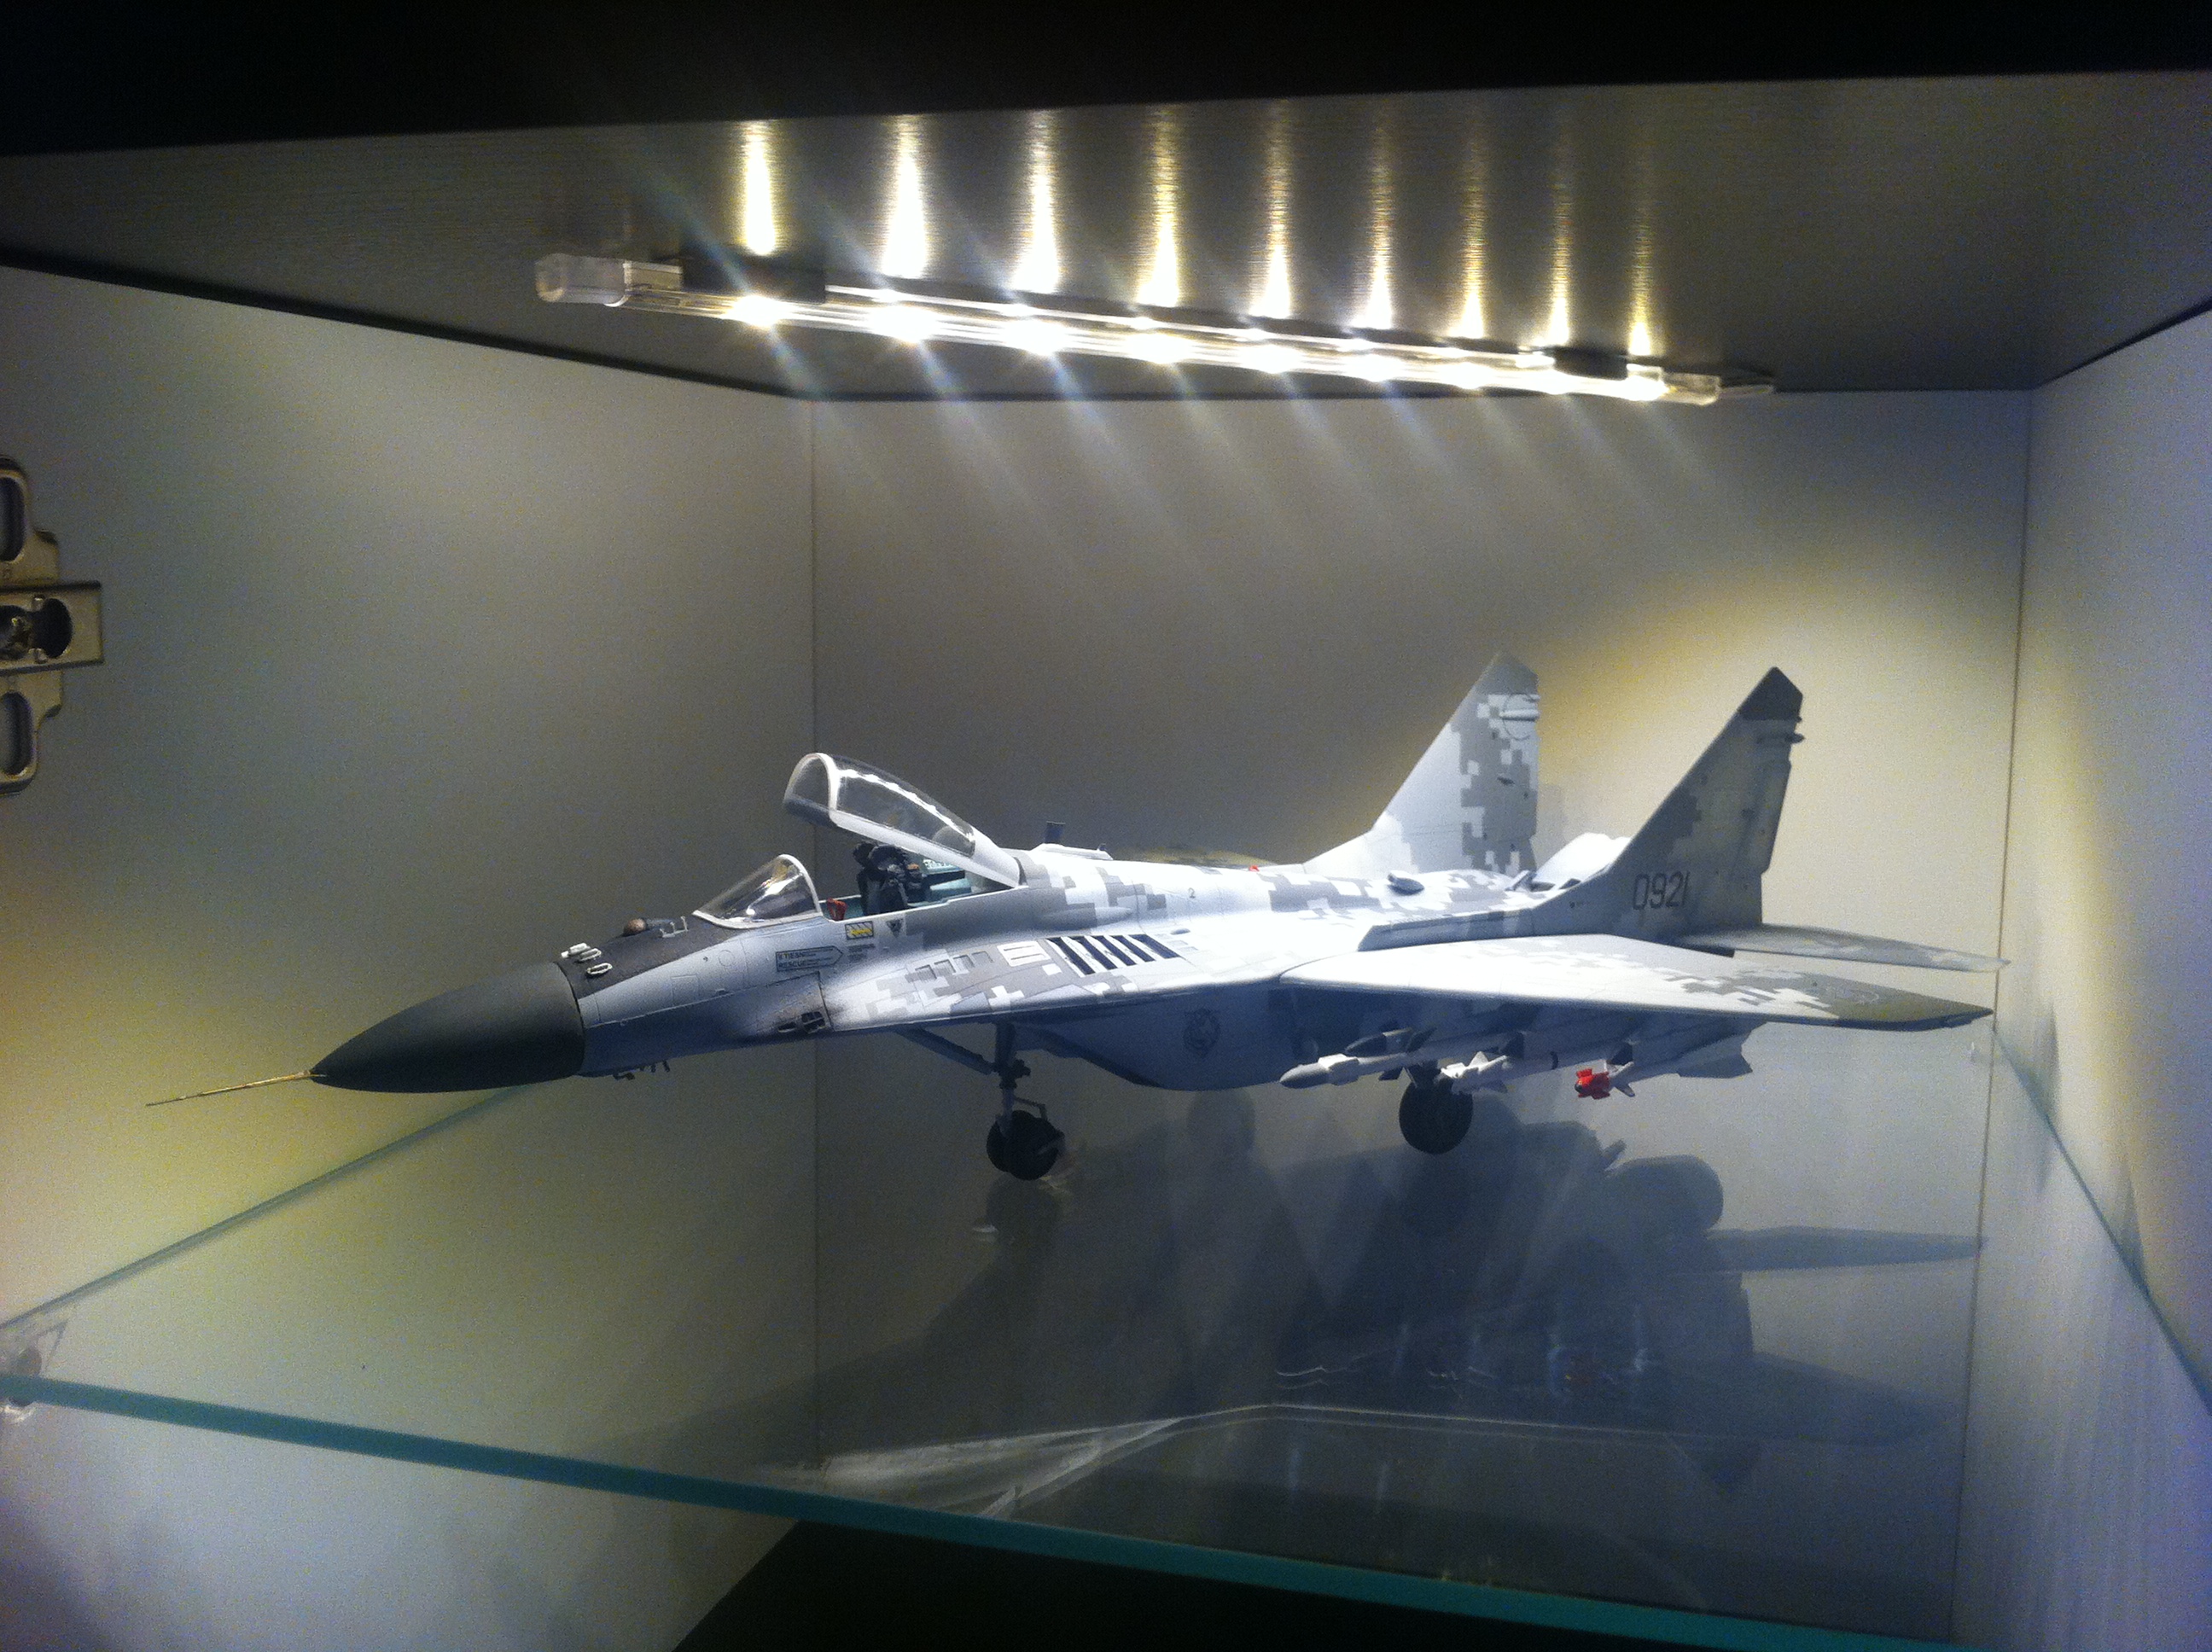
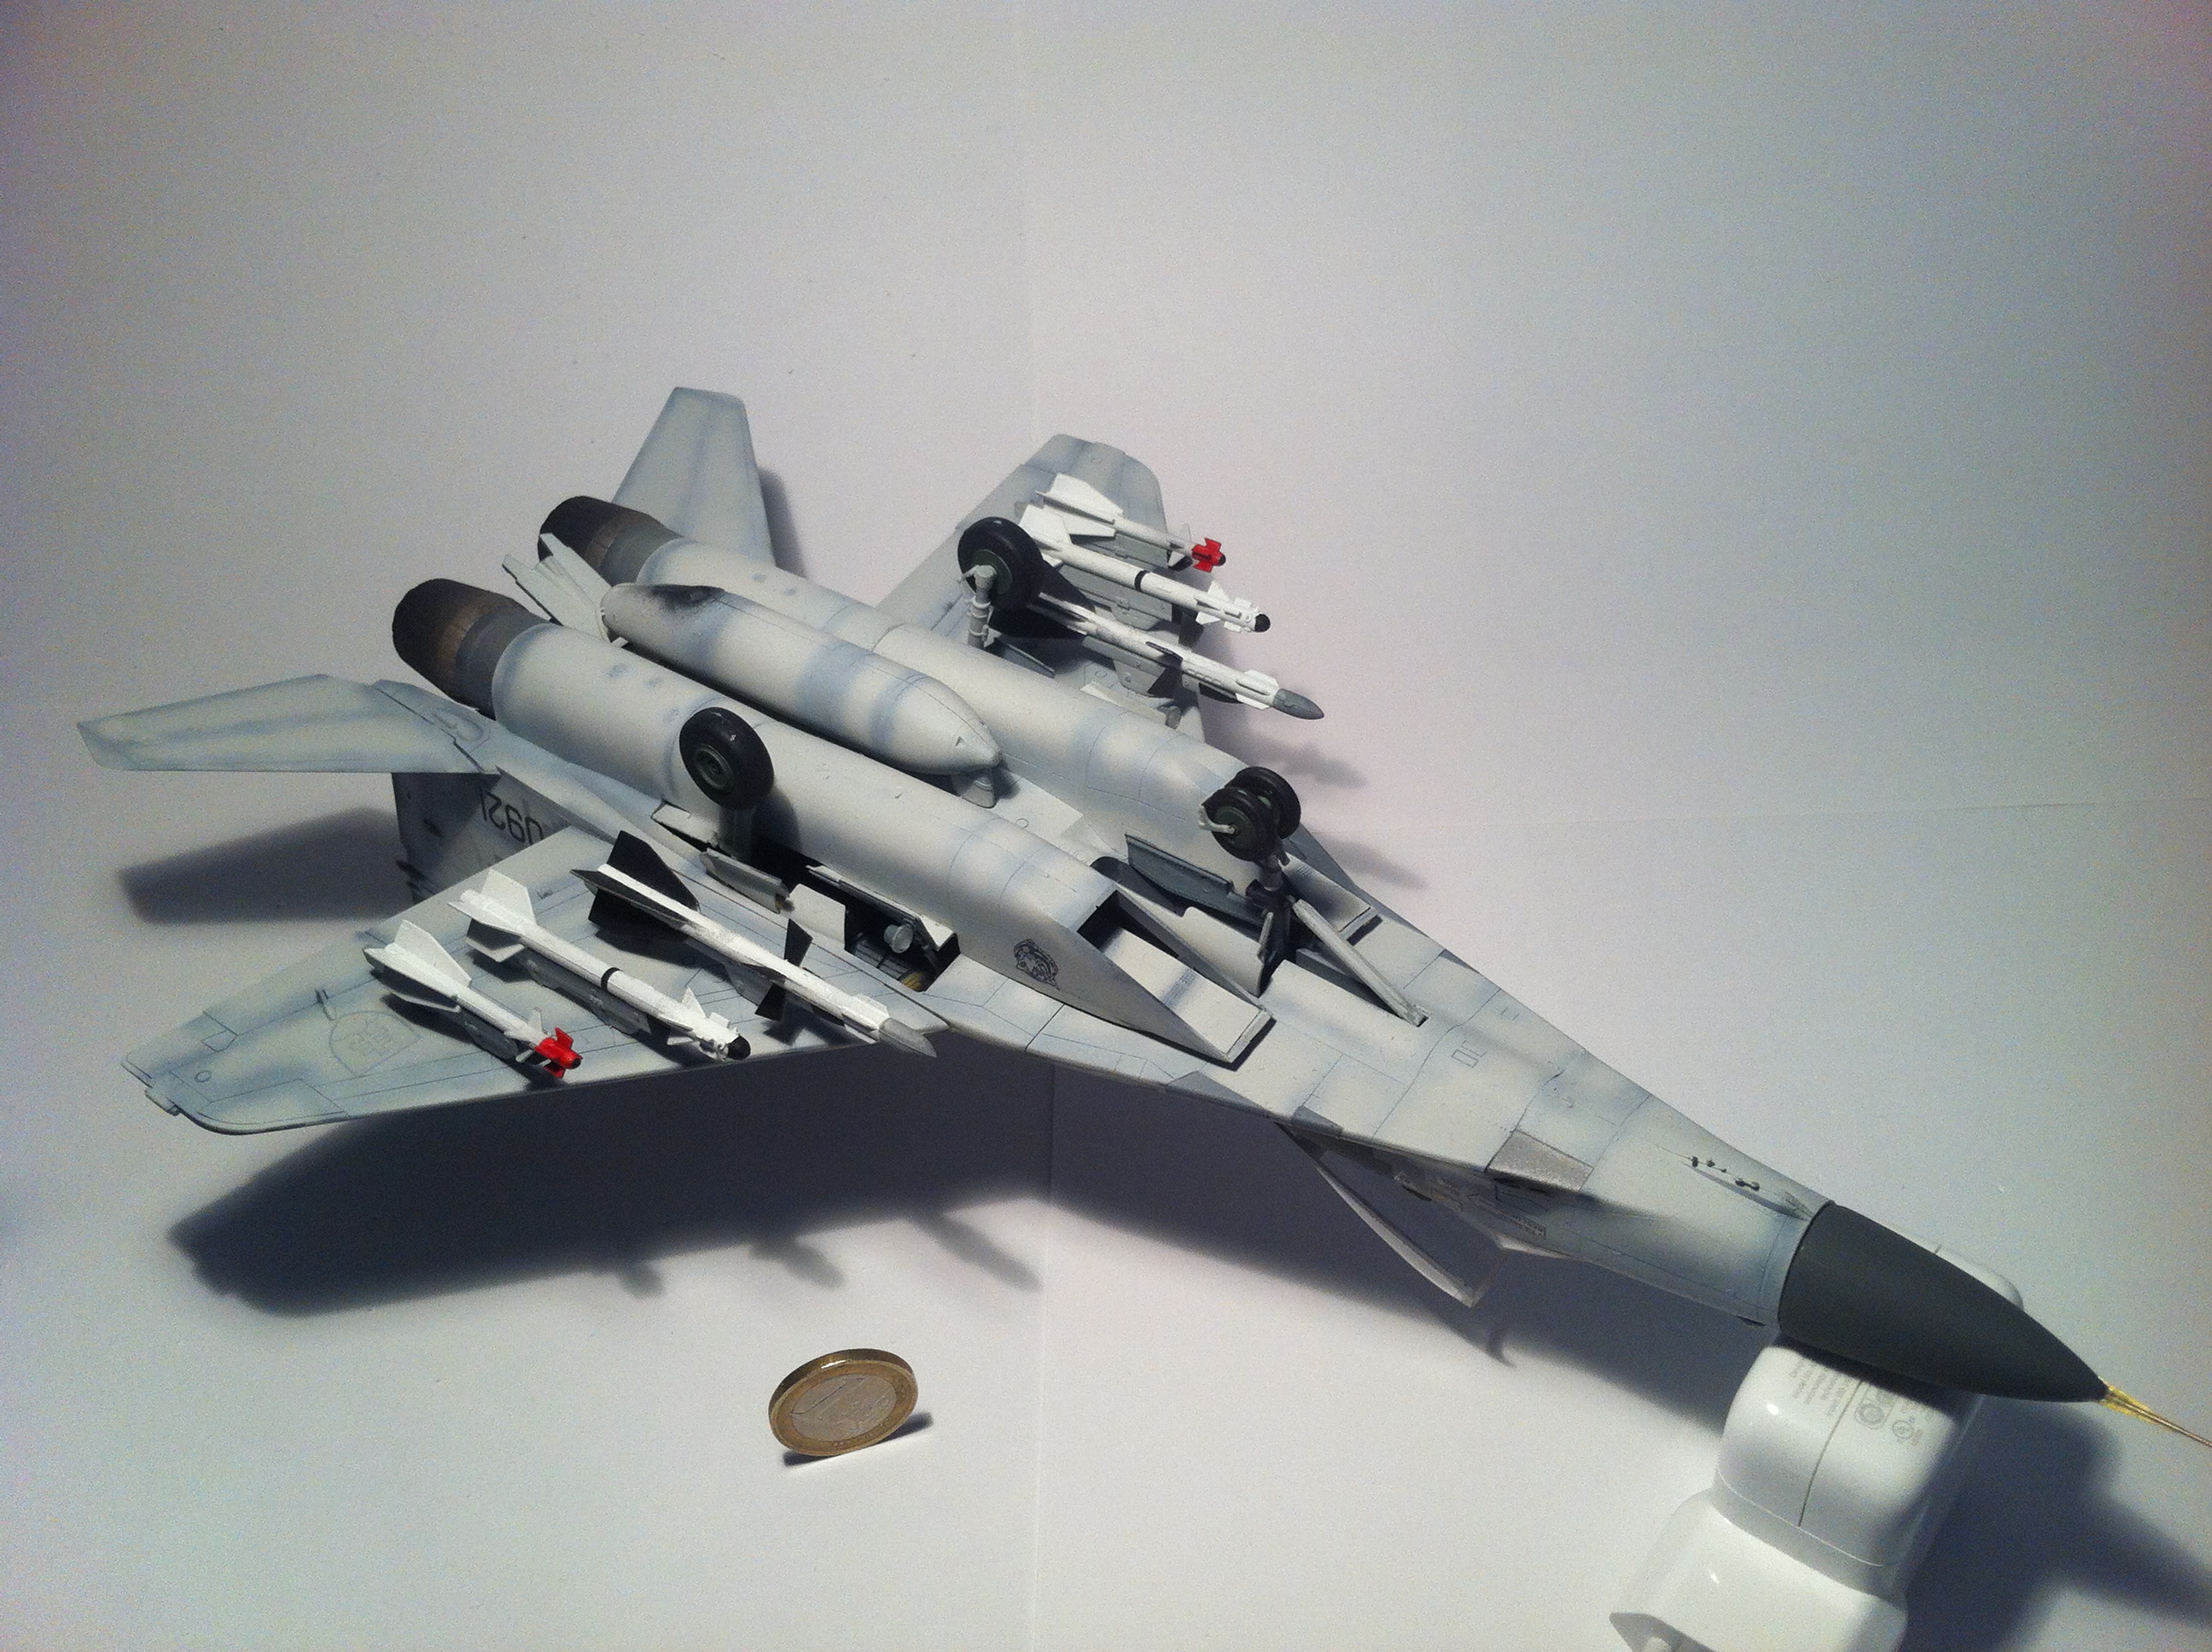
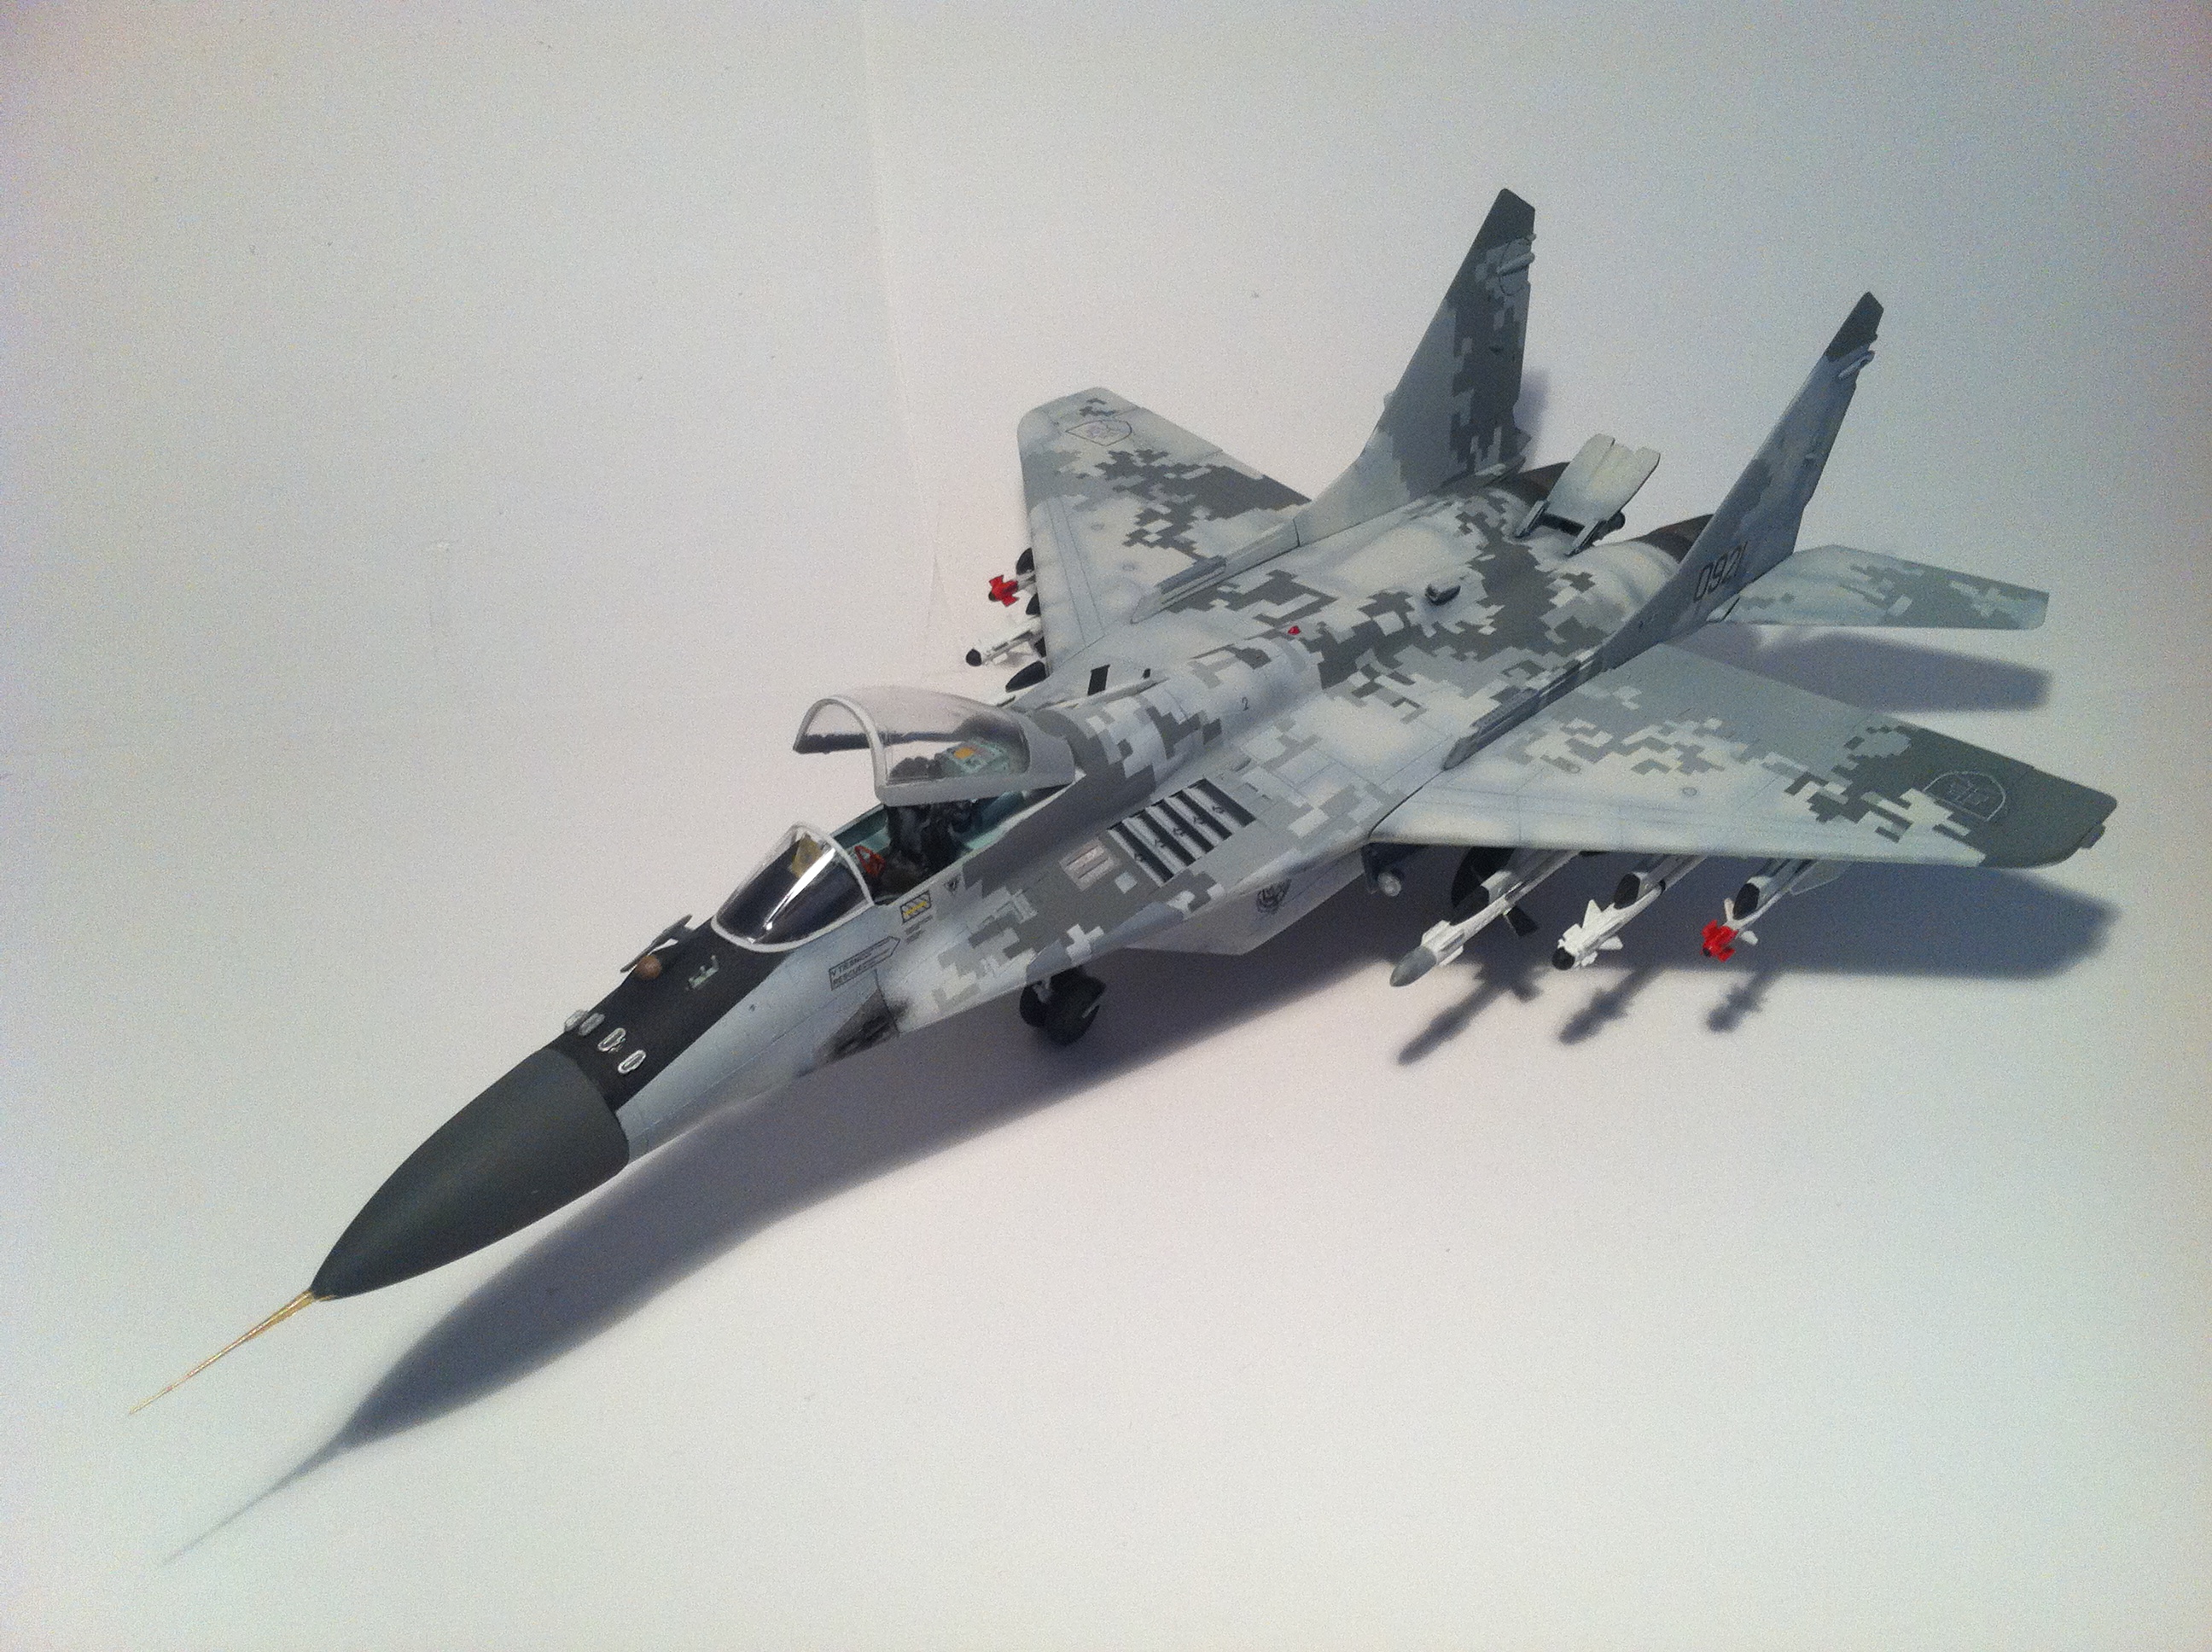
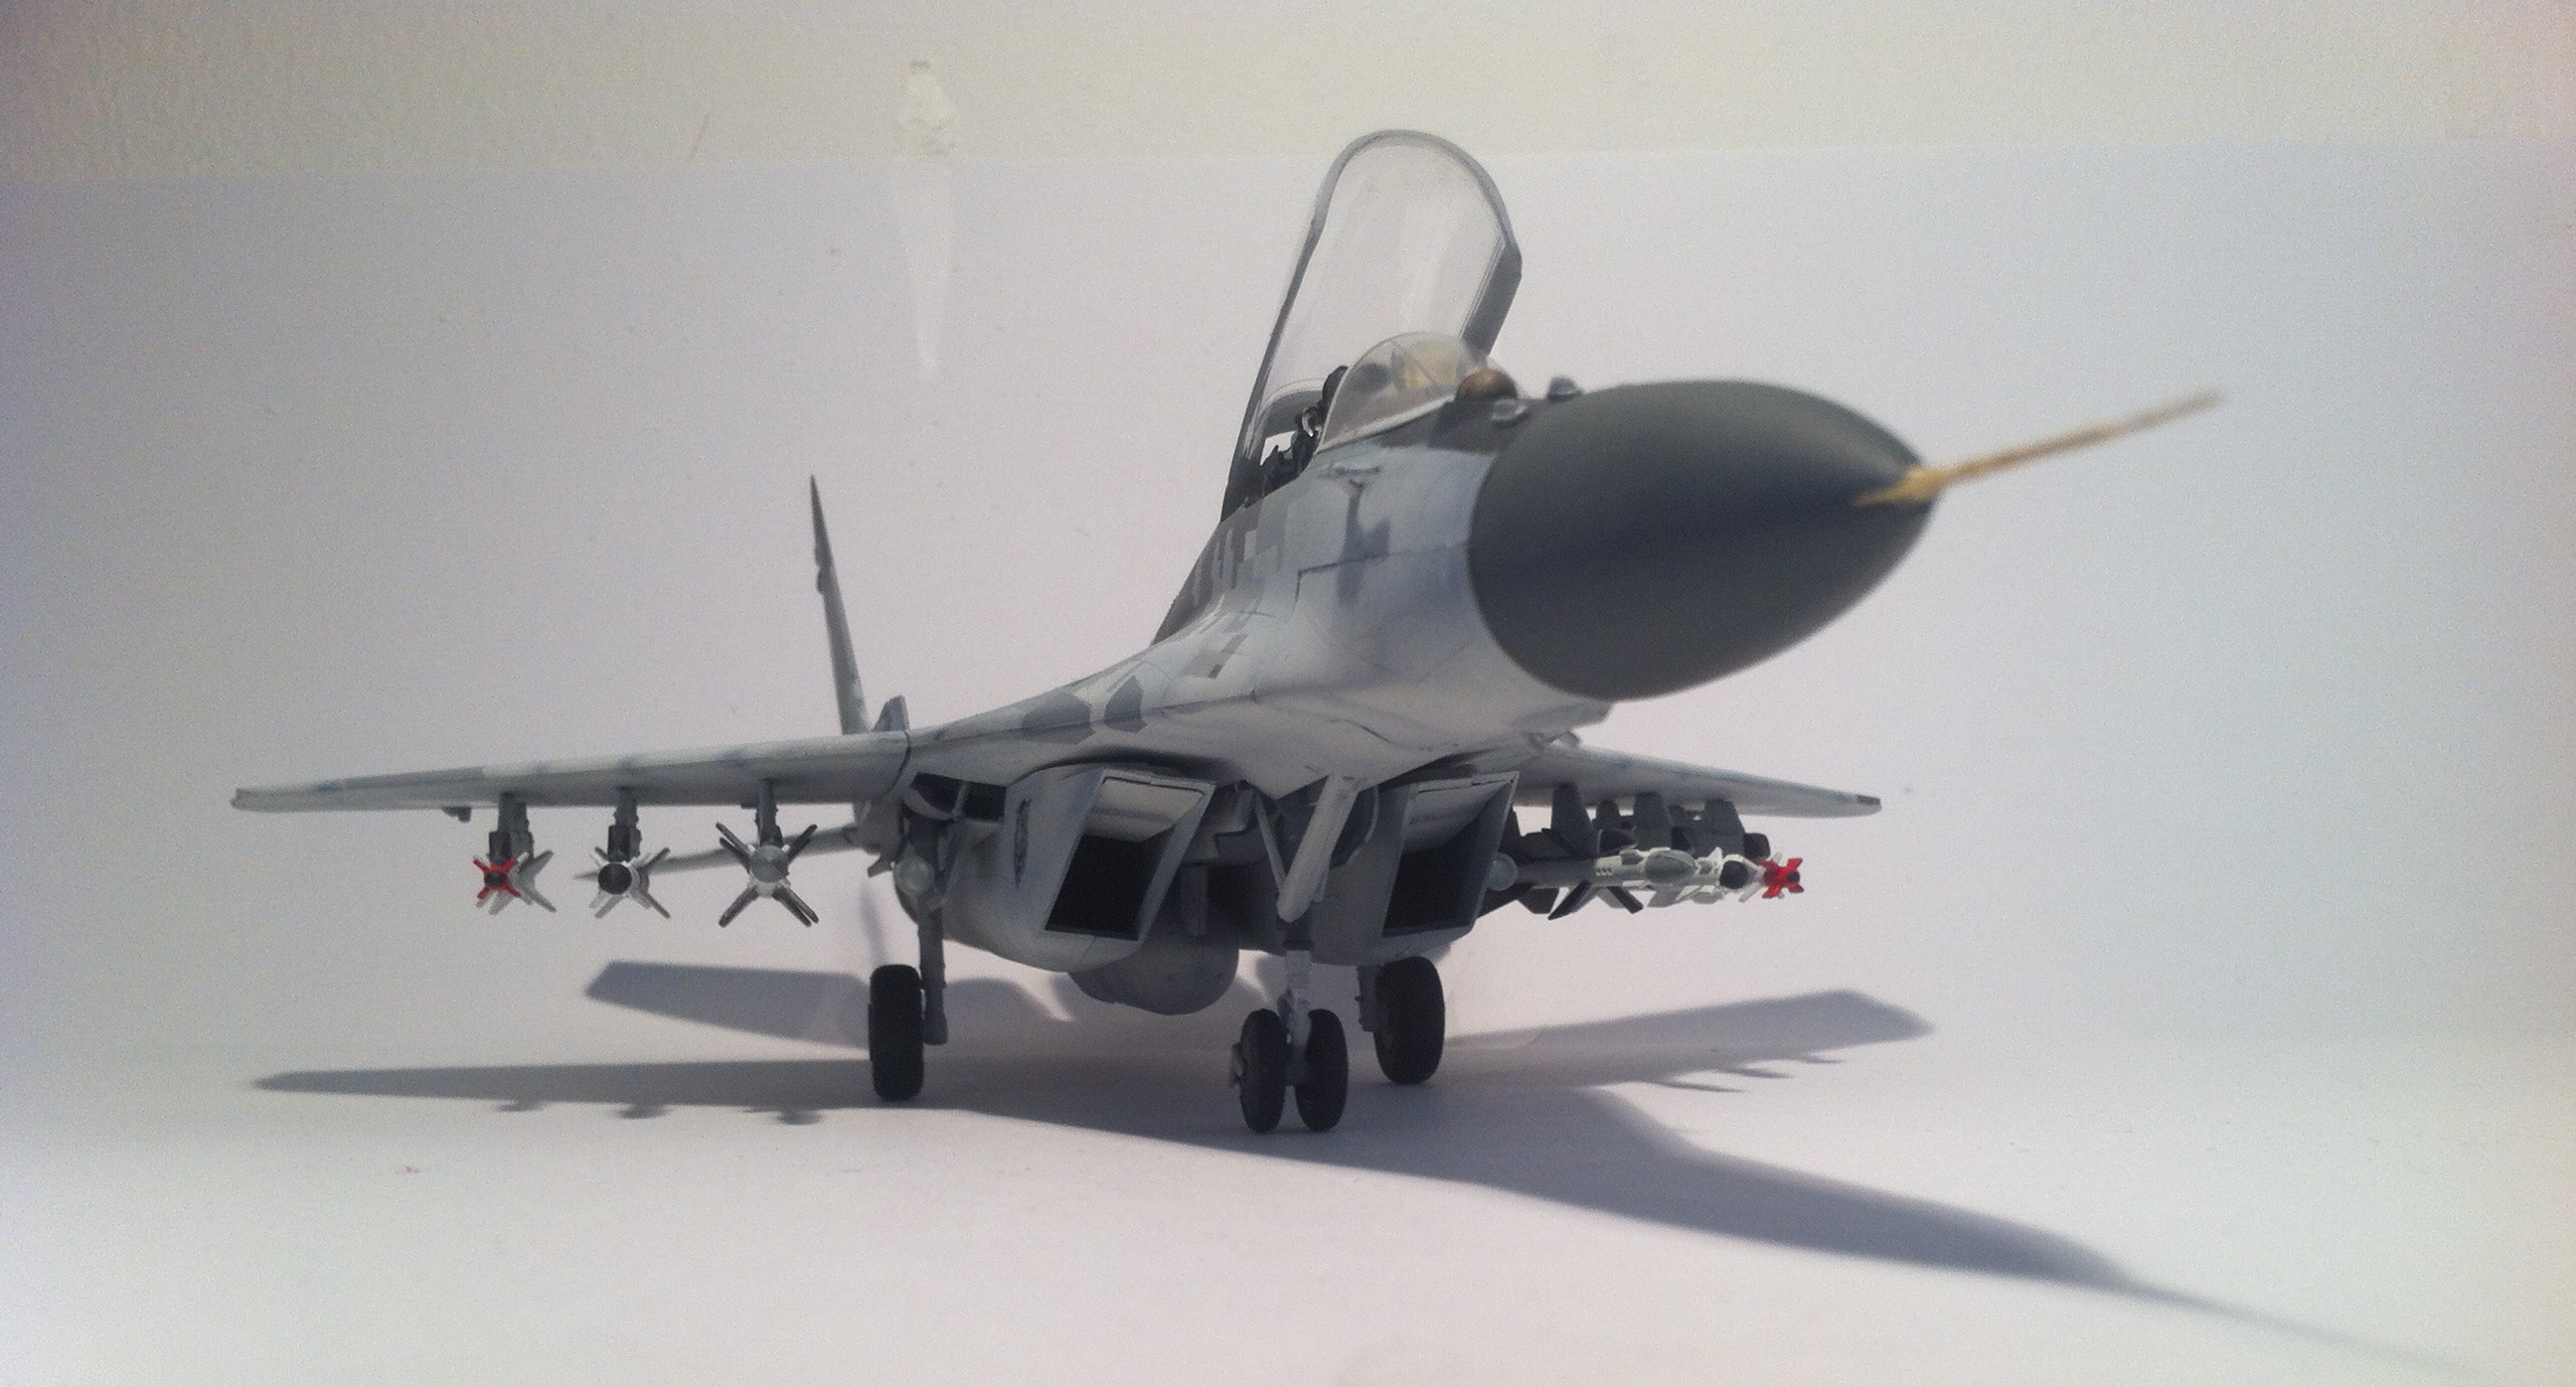
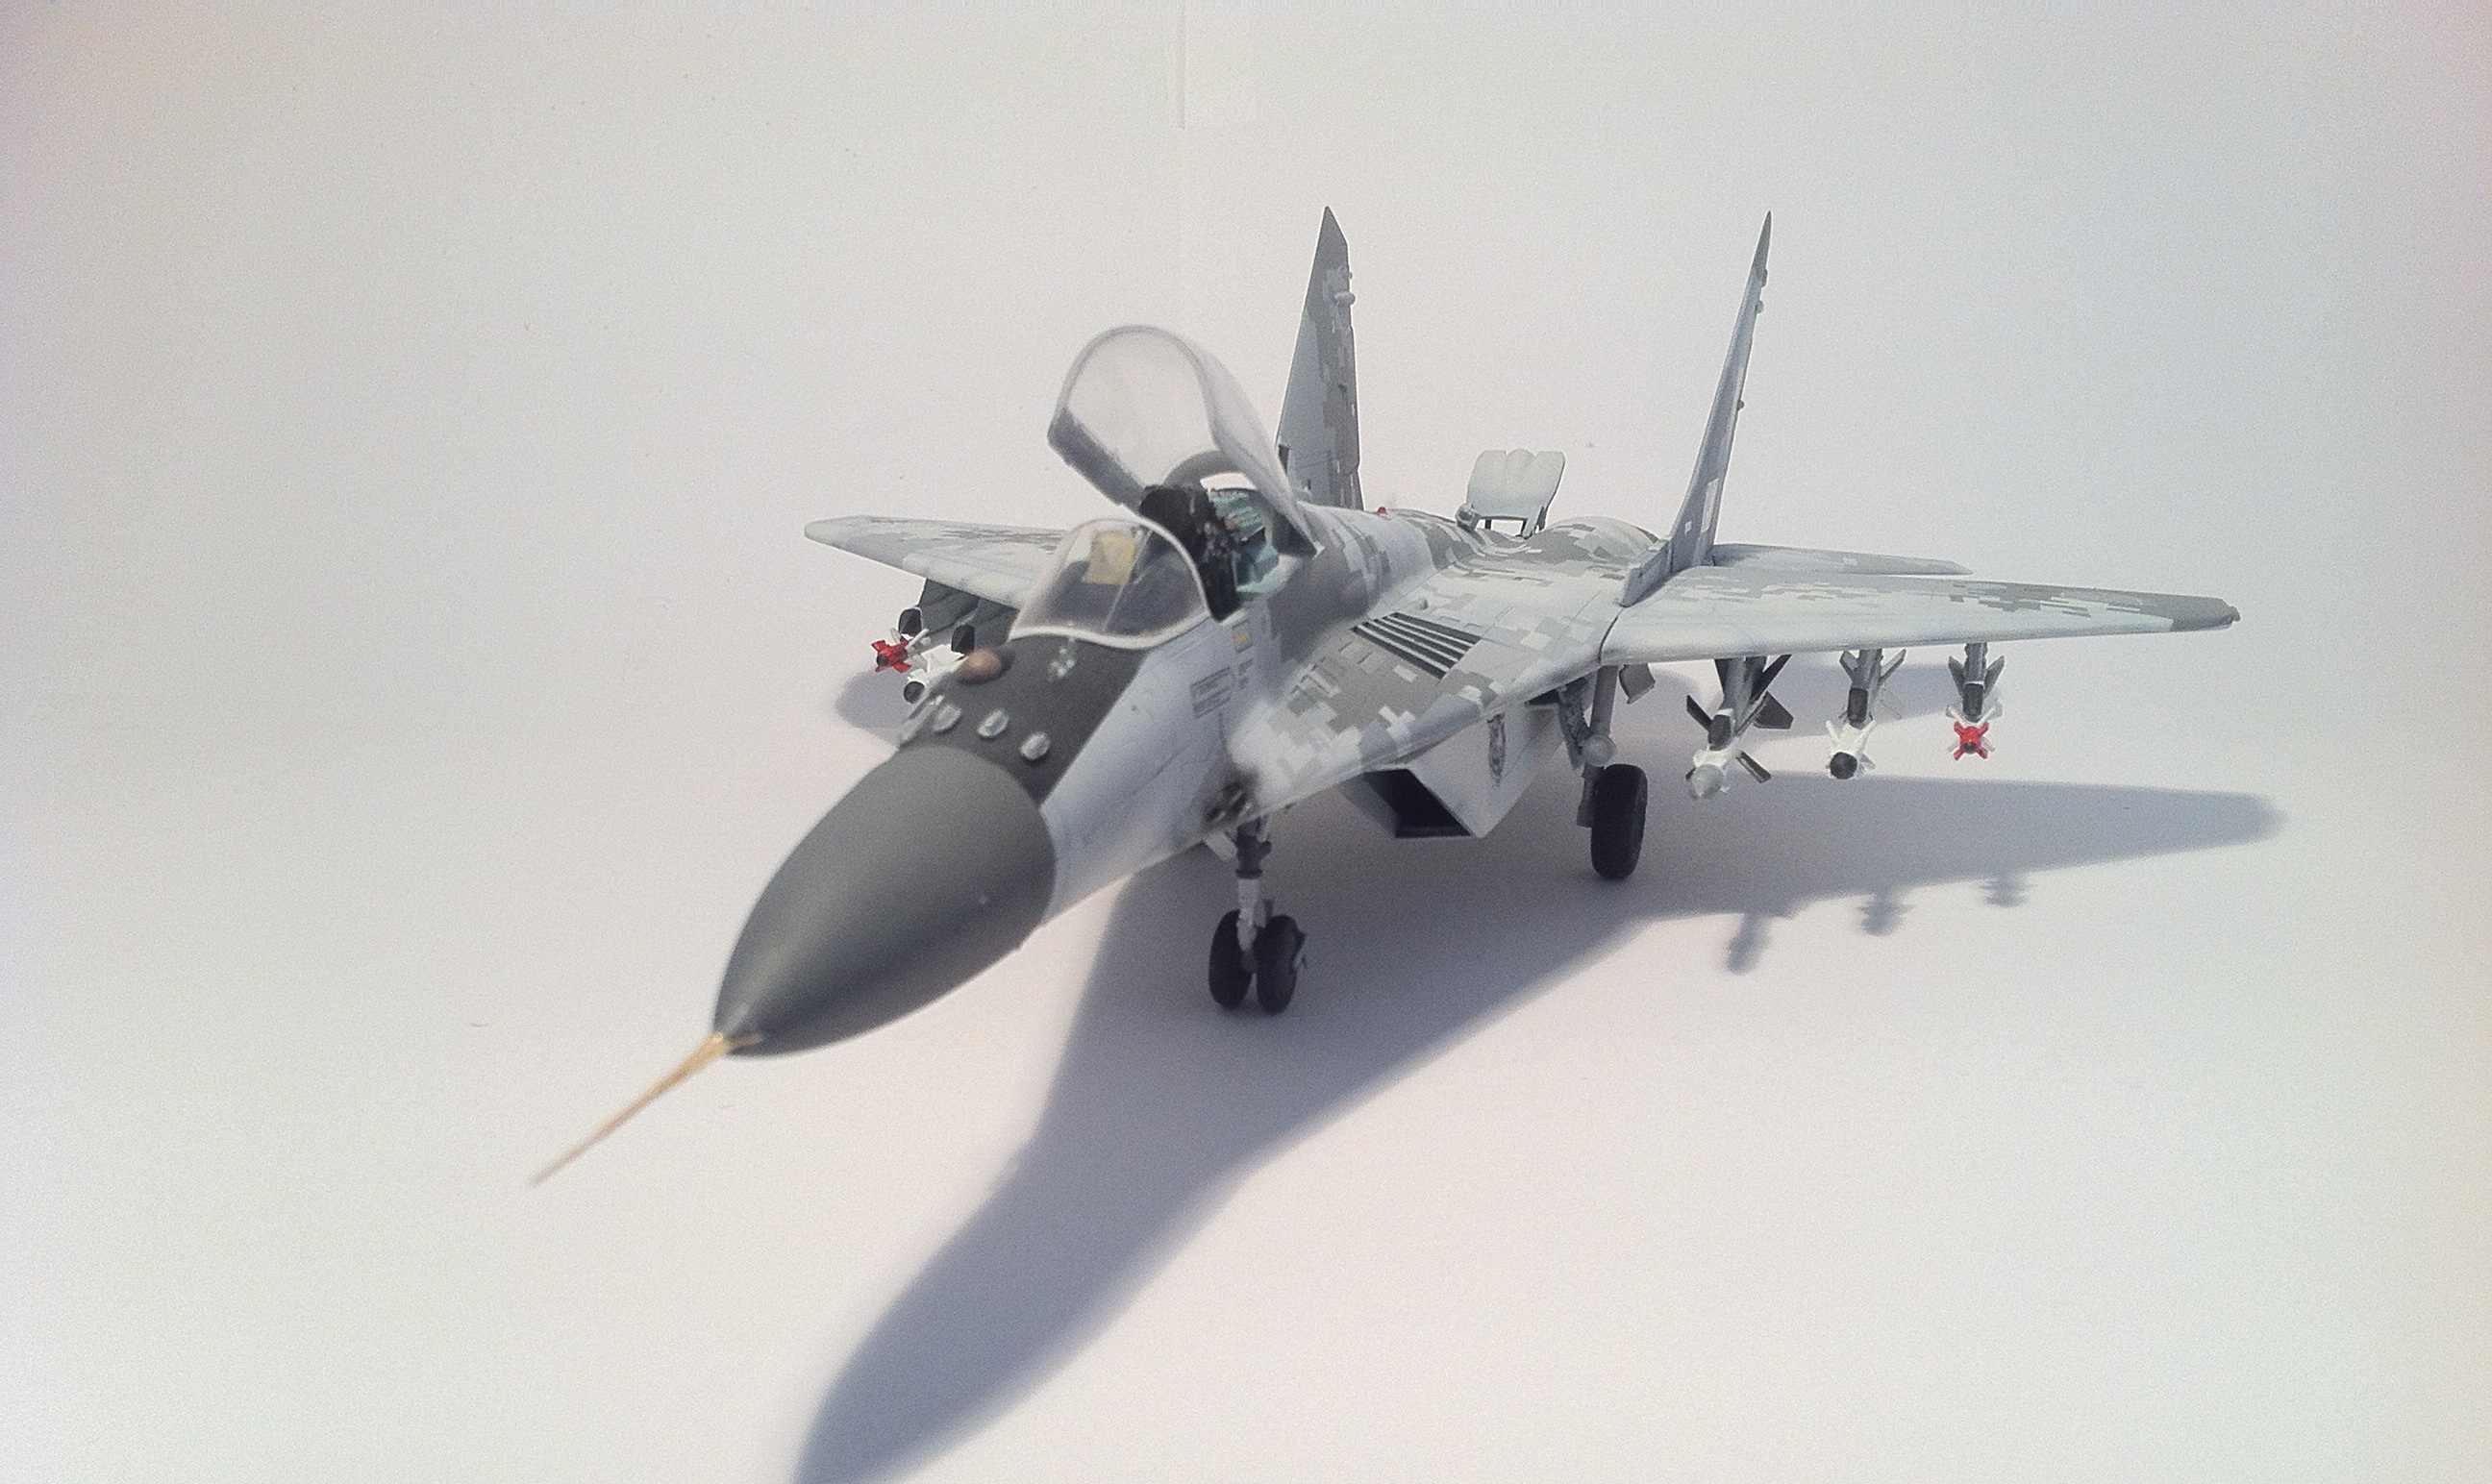
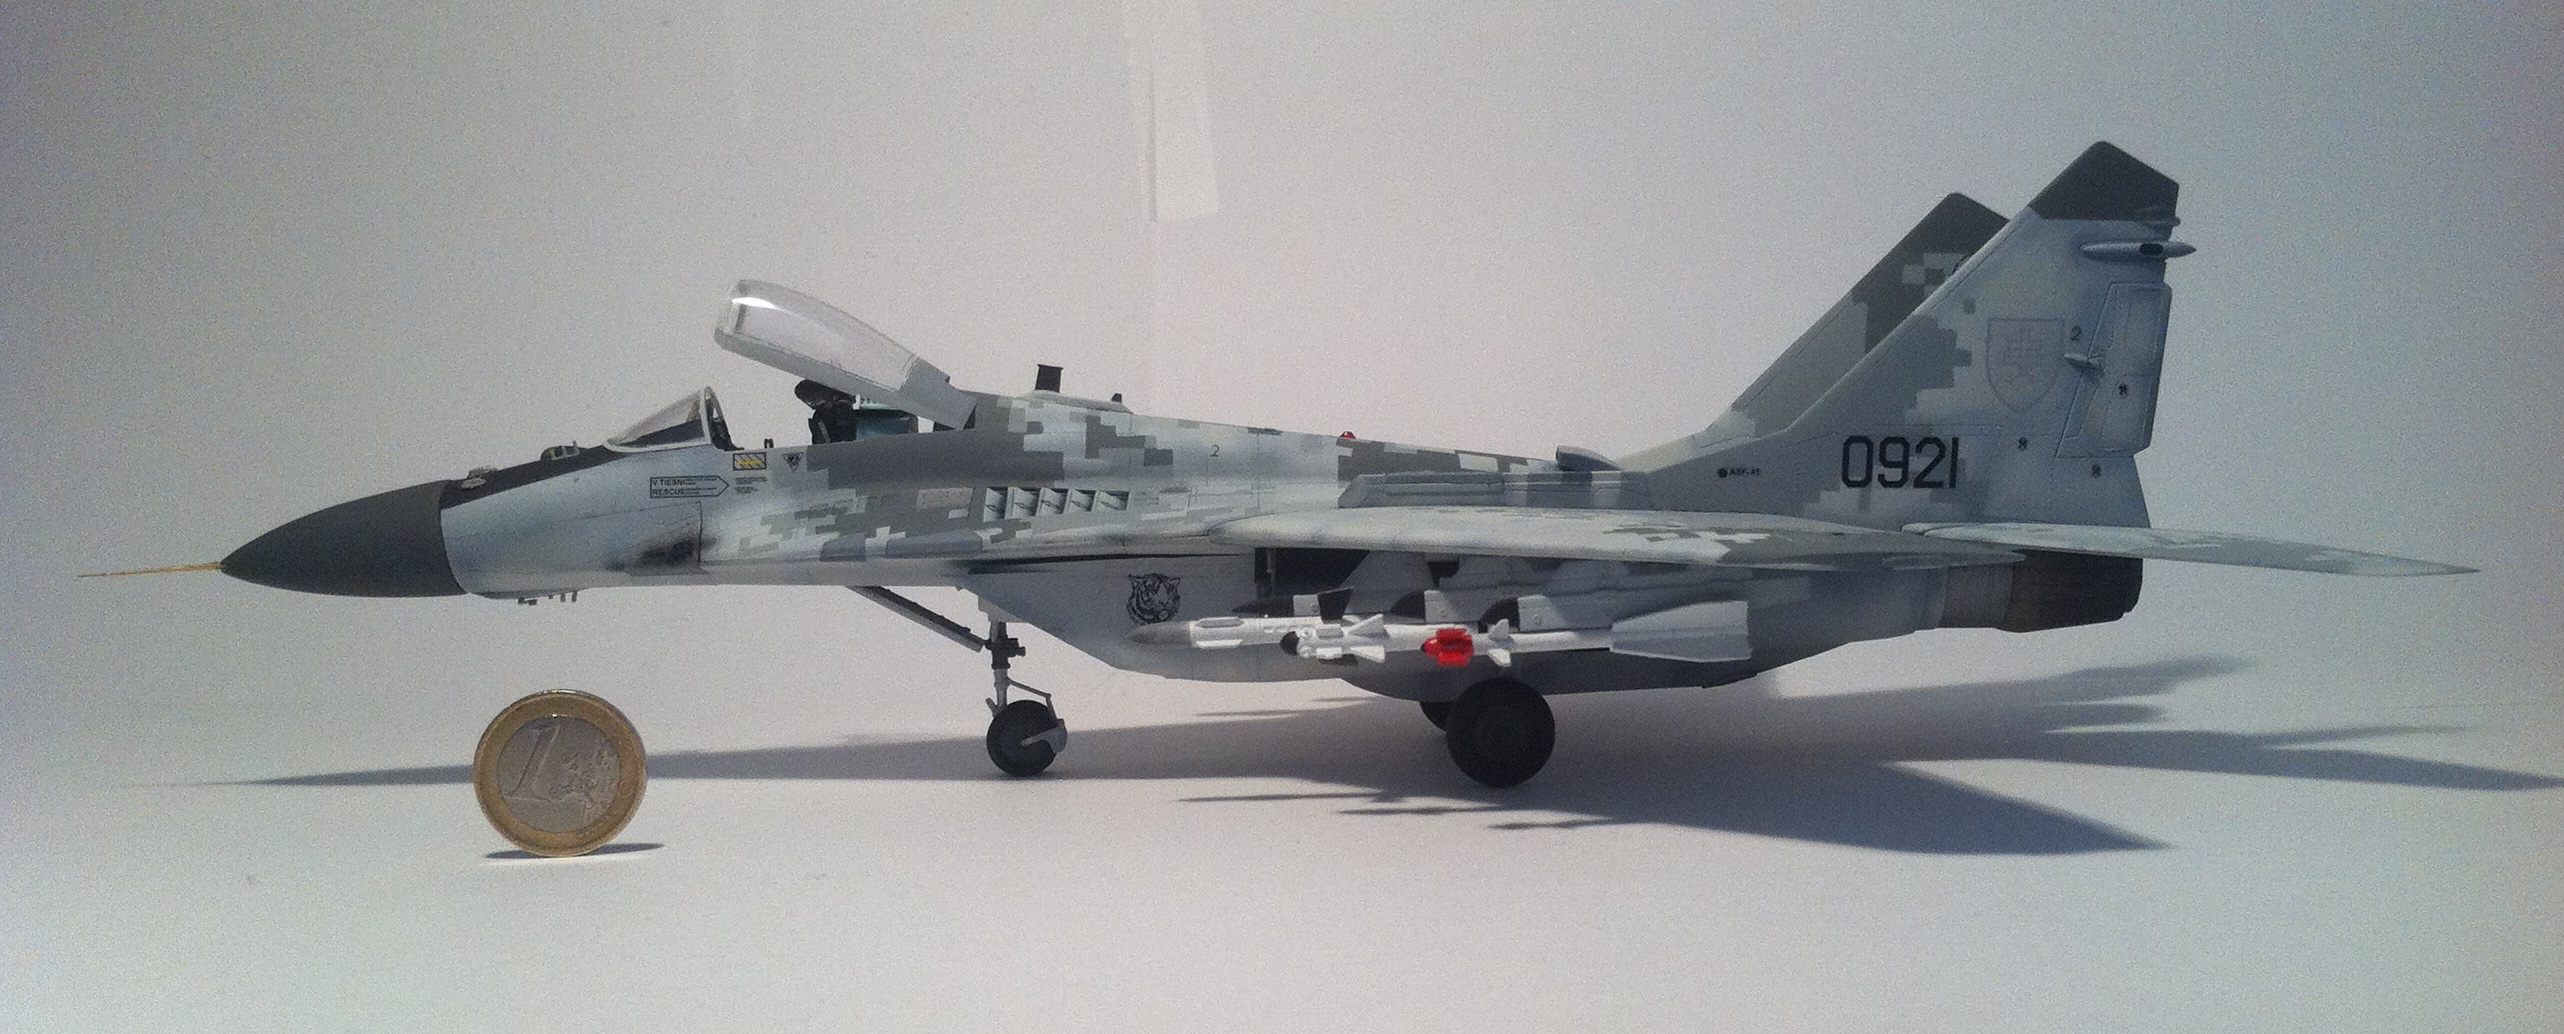
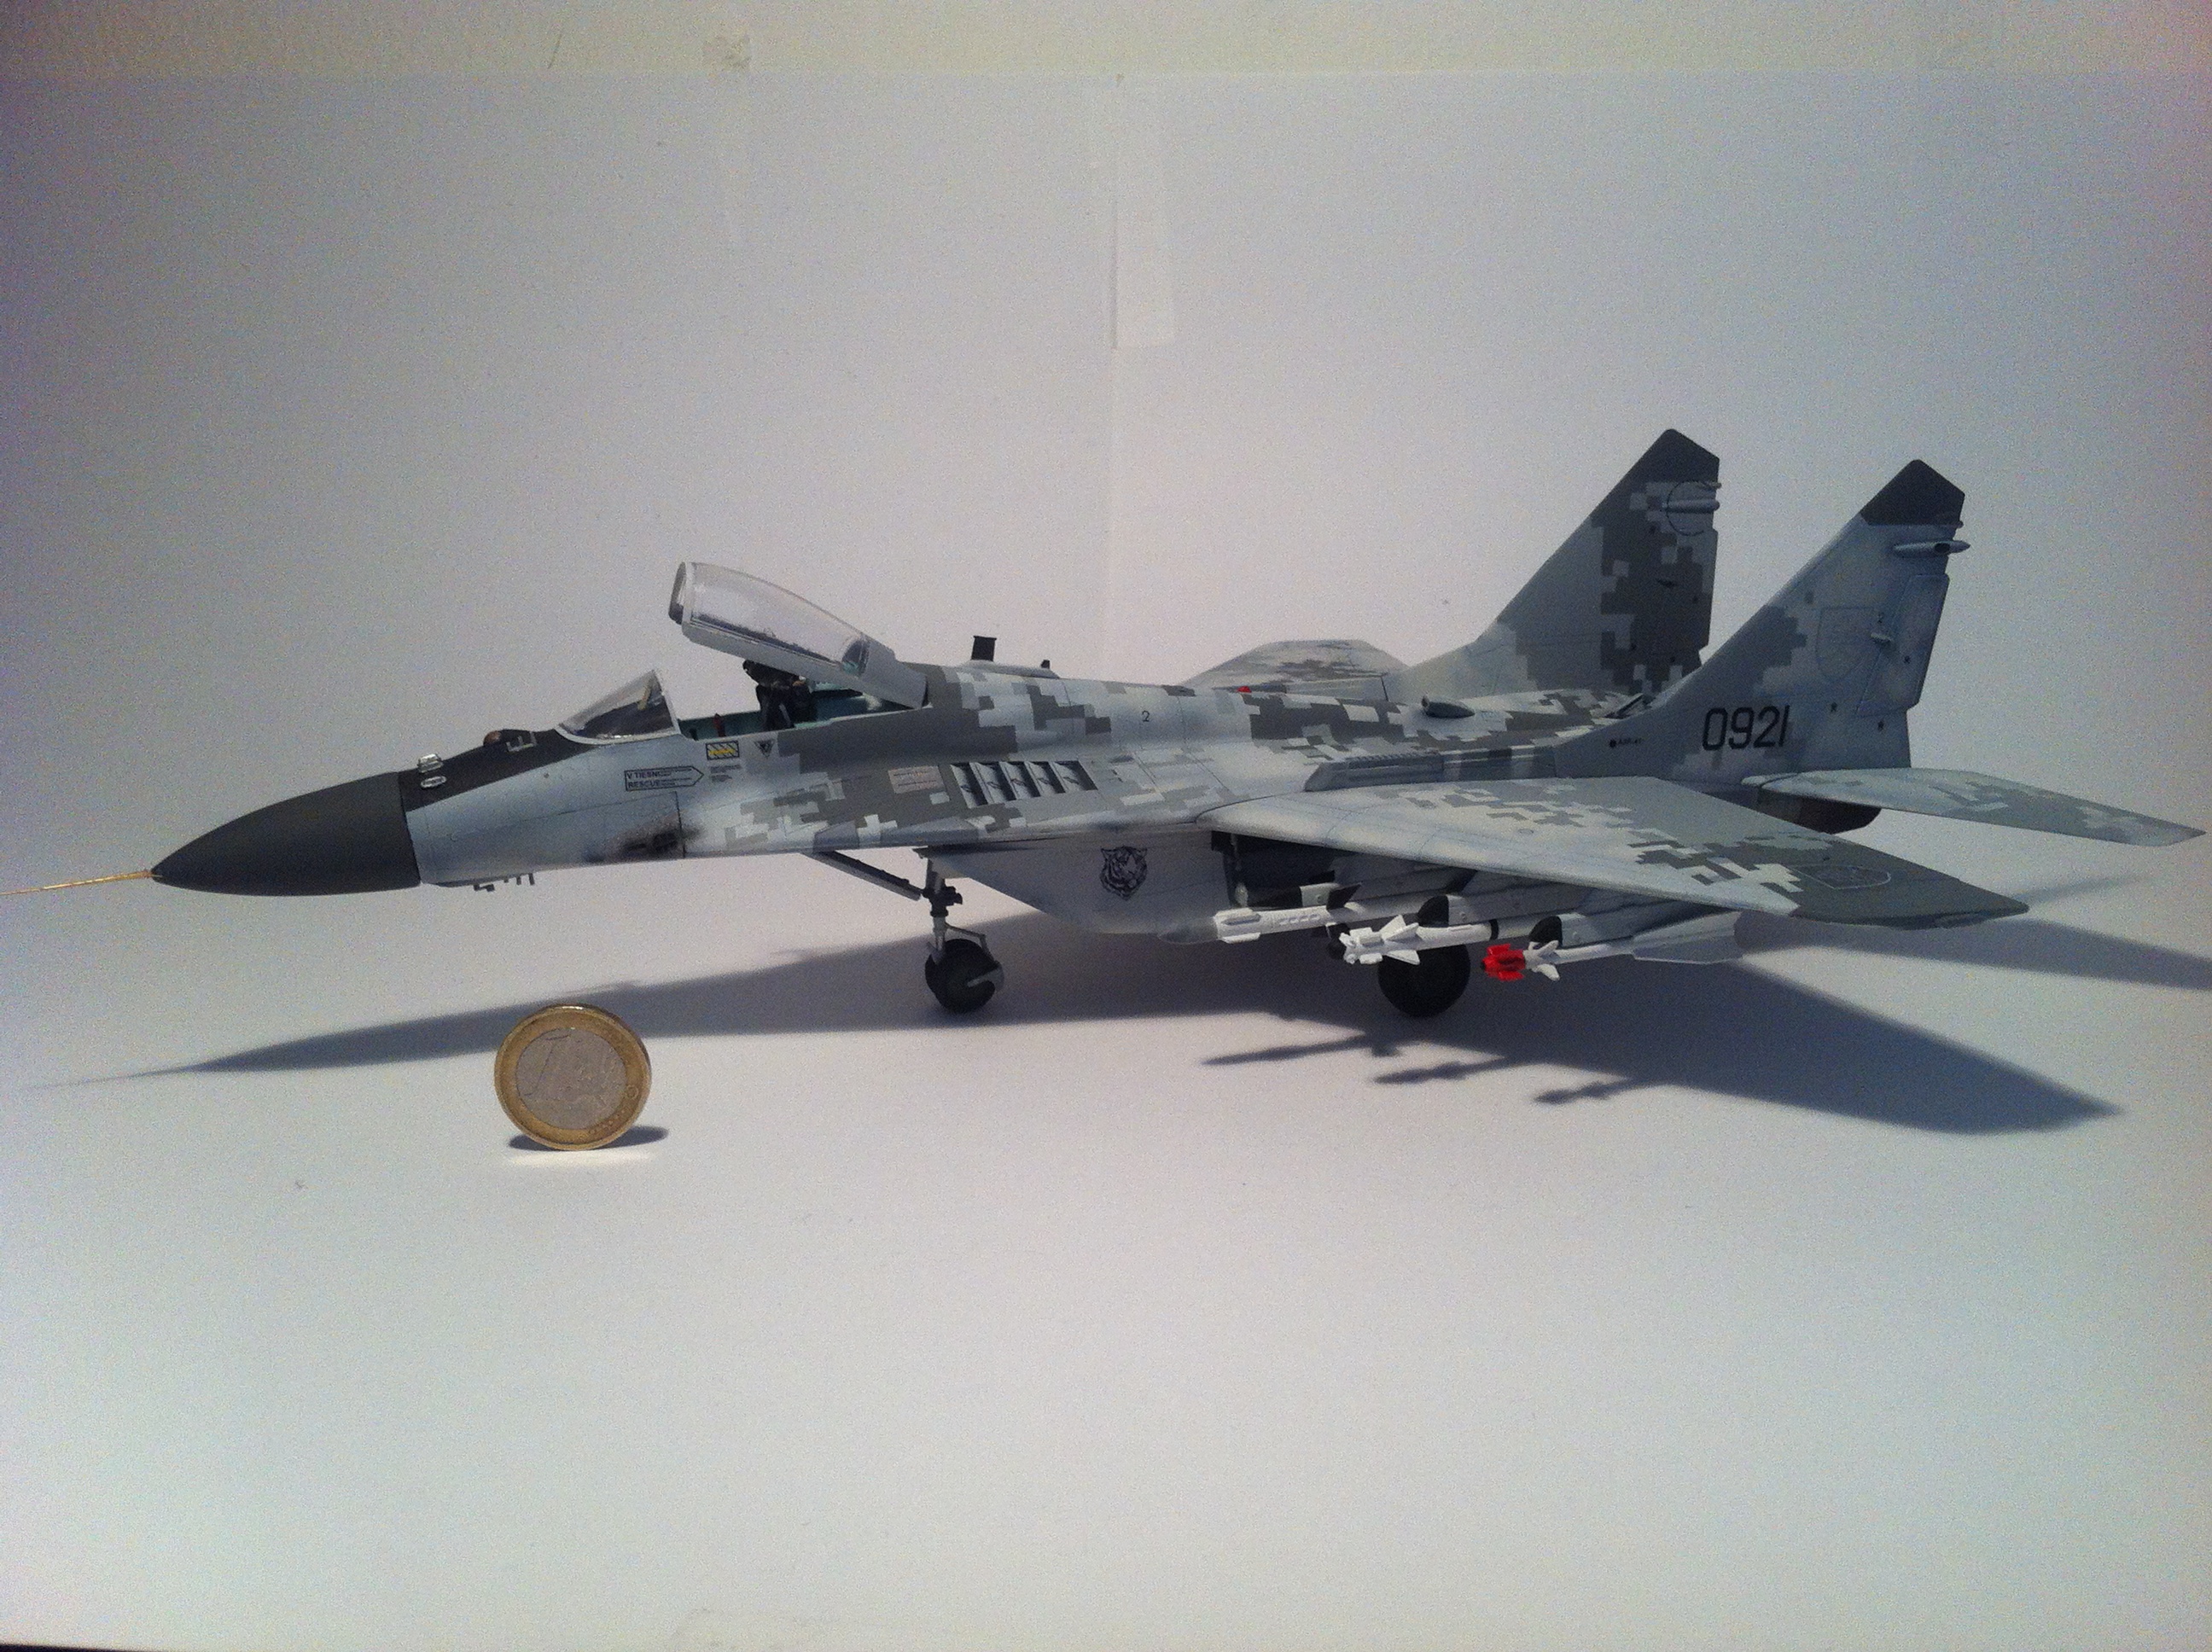
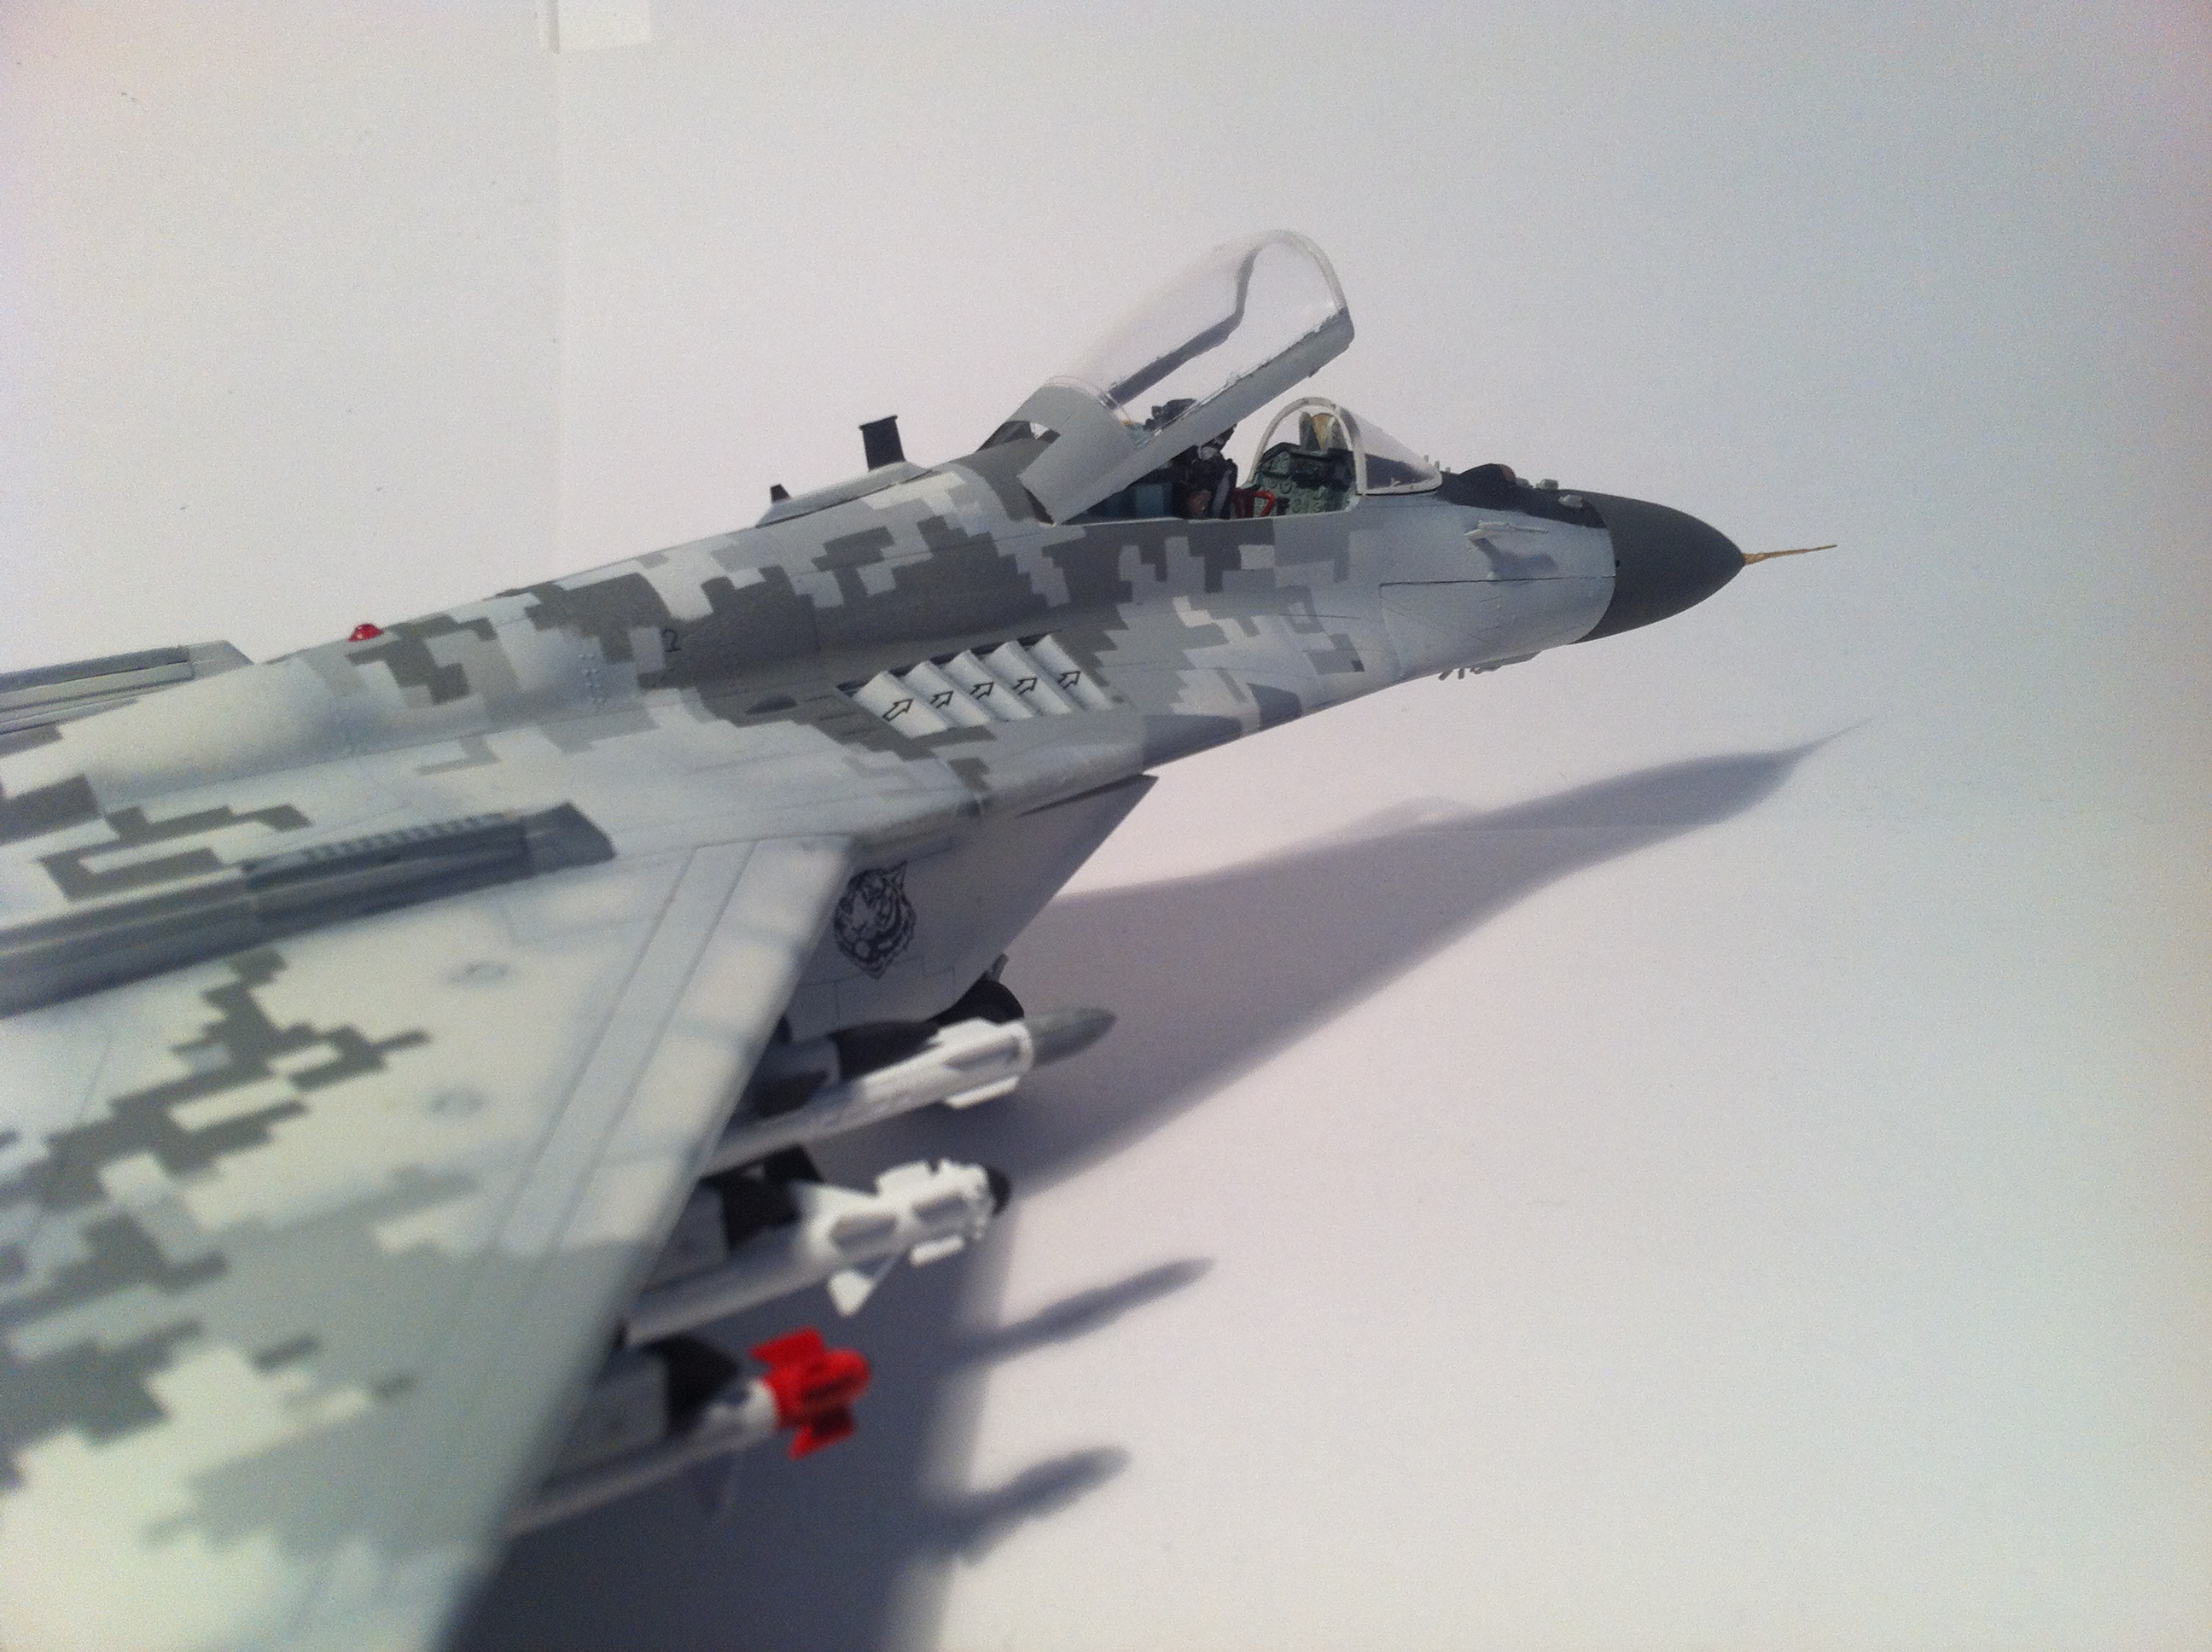
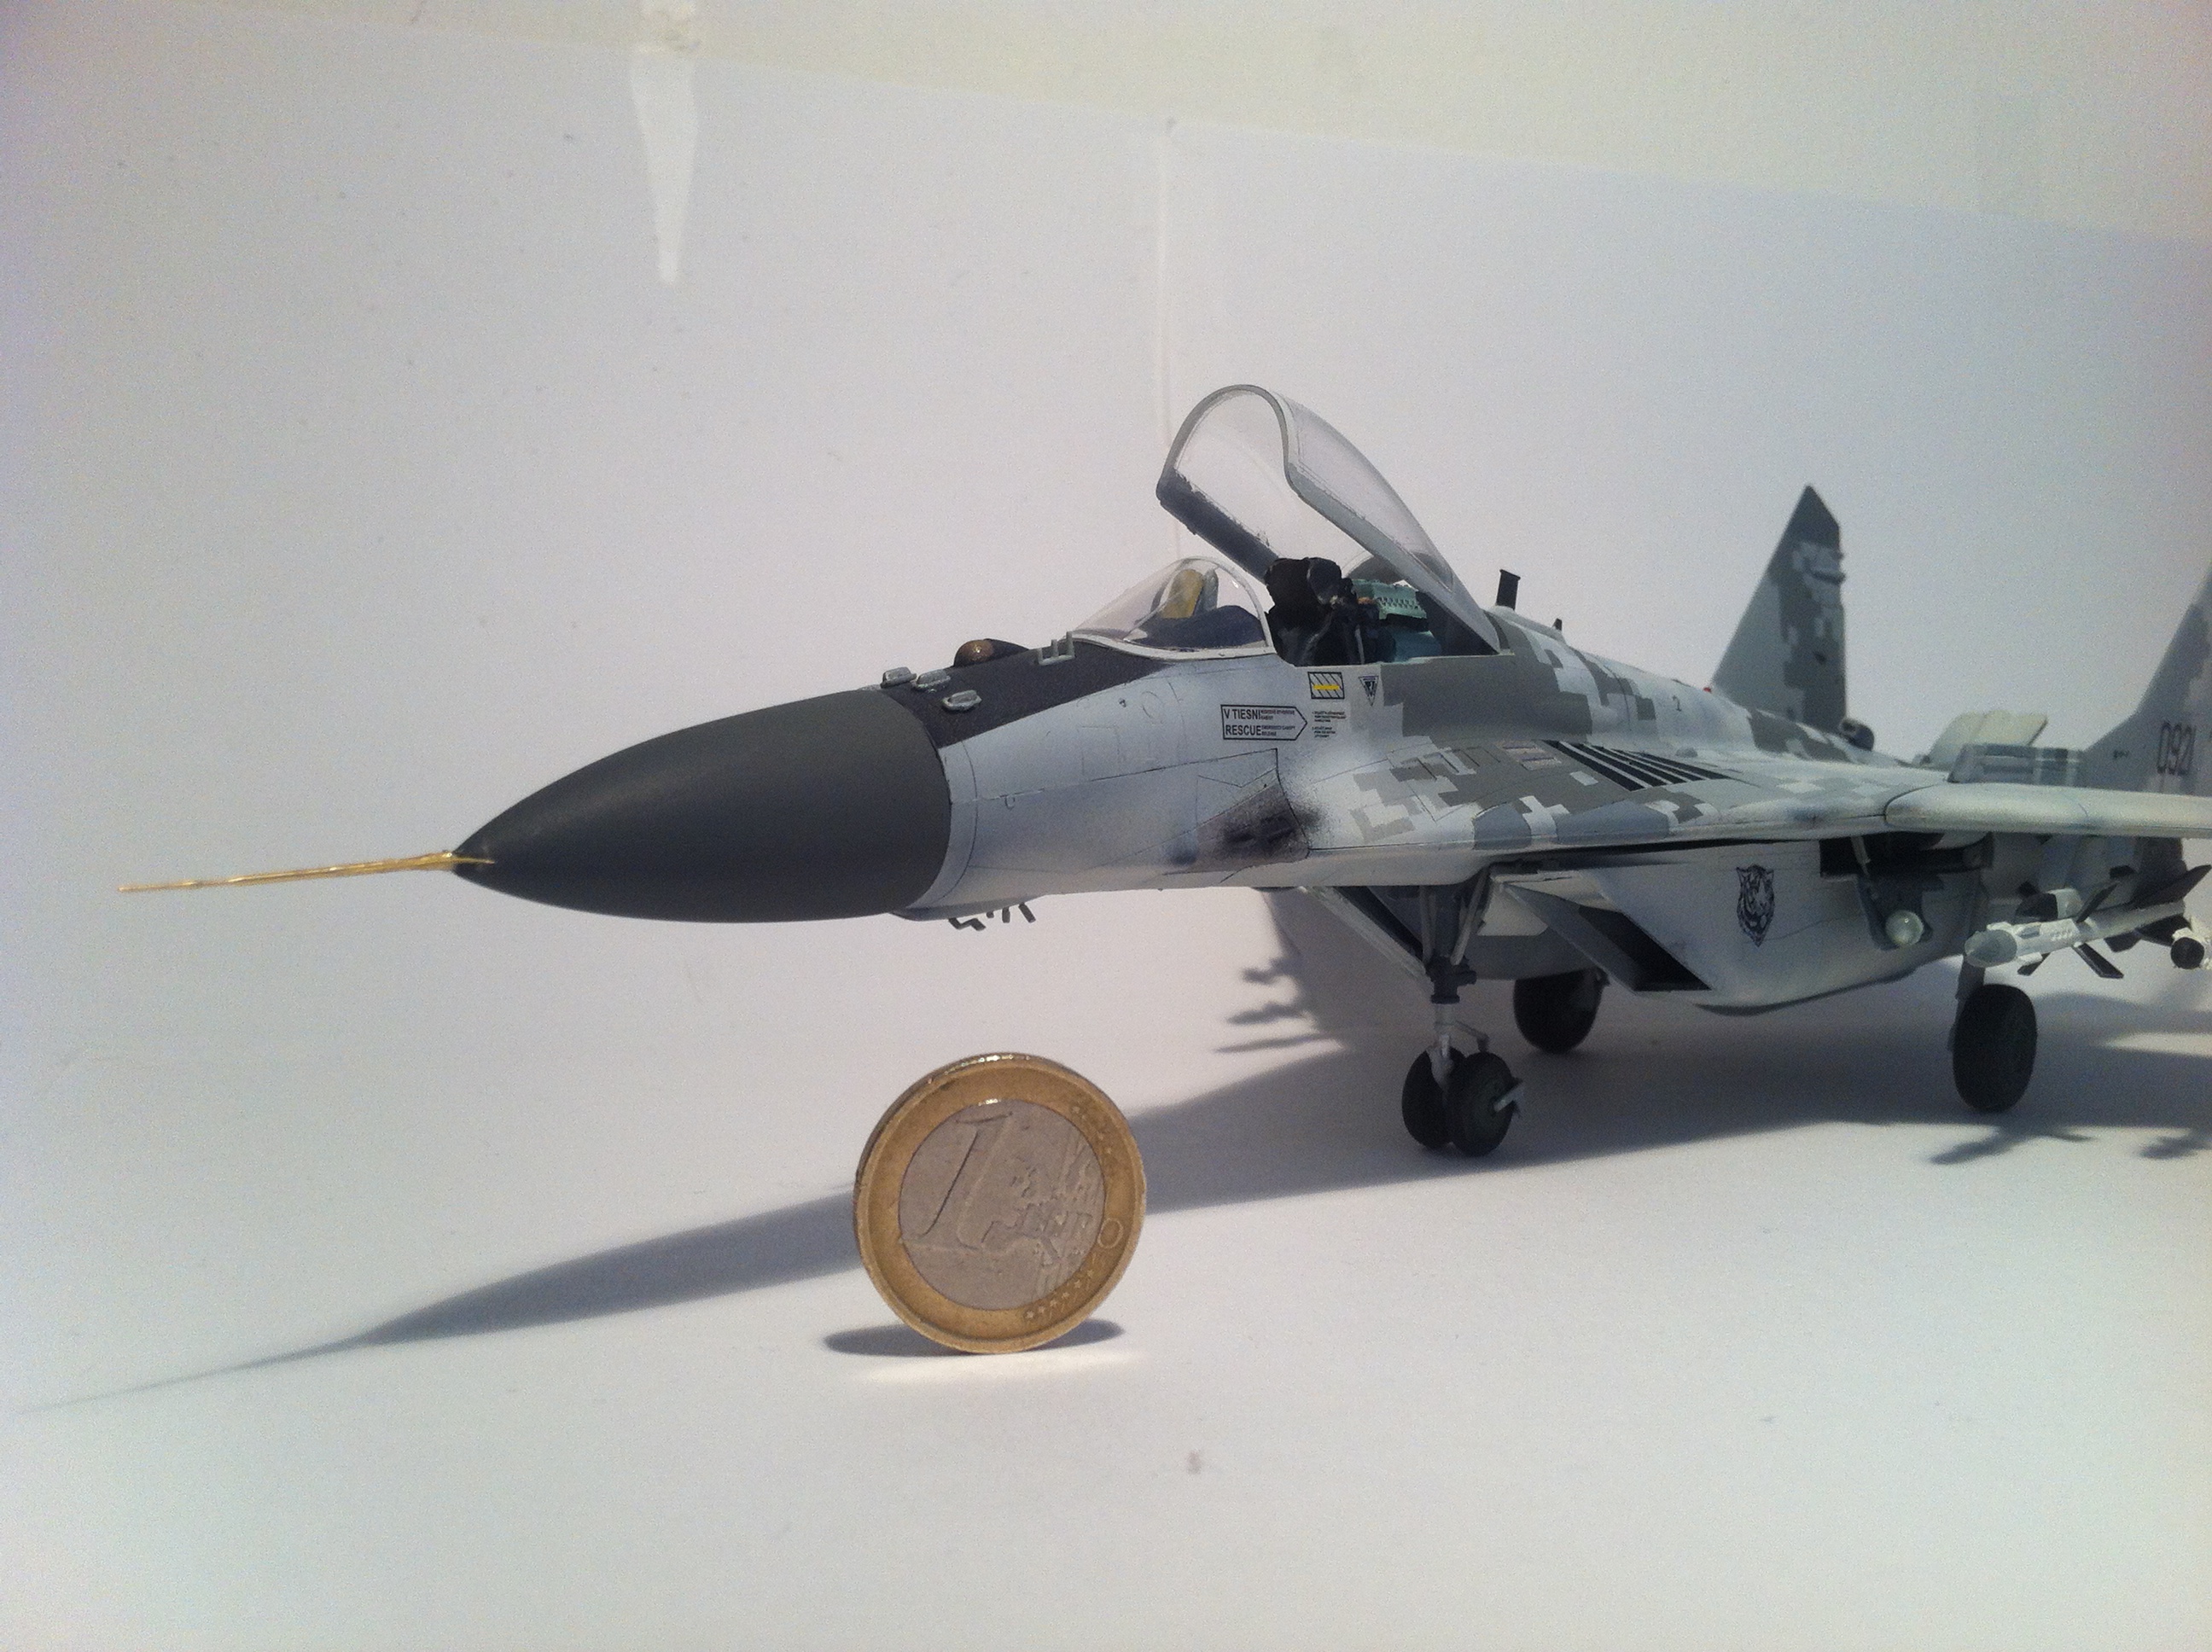
Slovak Air Force 2008 – Digital Camouflage MiG-29, Academy 1/48 scale model (with custom nose and ejection seat replacing vanilla parts)


Tools
Ok, this was the most sophisticated model I have ever build and I made some investment to my tools that I think will be worth in the long run. First of all, I bought another AirBrush/SprayGun to my existing hobby compressor.

Price: 49Eur
But in contrast to the vanilla spray gun that came with my “Revell Basic AirBrush Set”, this new SprayGun has much more smaller action diameter and enables much better details with its 0,3mm nozzle, which was very much needed to do pre-shading.
Custom parts replacement kits
Now, I am actually not that much keen to details, but after a little incident with too much glue to the original nose, I was forced to look on ebay to find alternative nose for the MiG-29 and I have learned that the vanilla Academy model has a nose with incorrect angles. So a replacement actually helped the realism a little.
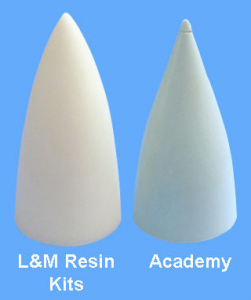
Correct Mig29 “nose”
The Mig29 nose from Academy model was considered very wrongly modelled and combined with the fact that I managed to demage the vanilla nose from Academy, I ordered from ebay a replacement one with correct structure. Here is the comparison between the vanilla Academy one and the one I got made from resin. Price tag (including postage was around 7 Eur)
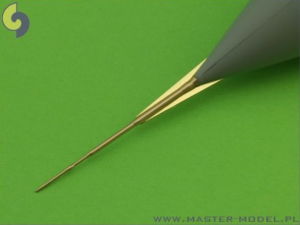
Correct “Pitot Tube”
Since I damaged also the front pitot tube (or antenna), I also ordered a replacement one, but this one is extremely nice one, it is made of metallic material and gives a very realistic look. This one was quite a price killer, 8 Eur for this small piece of metal, but after looking at it on ebay for 2 days I decided to order it anyway.
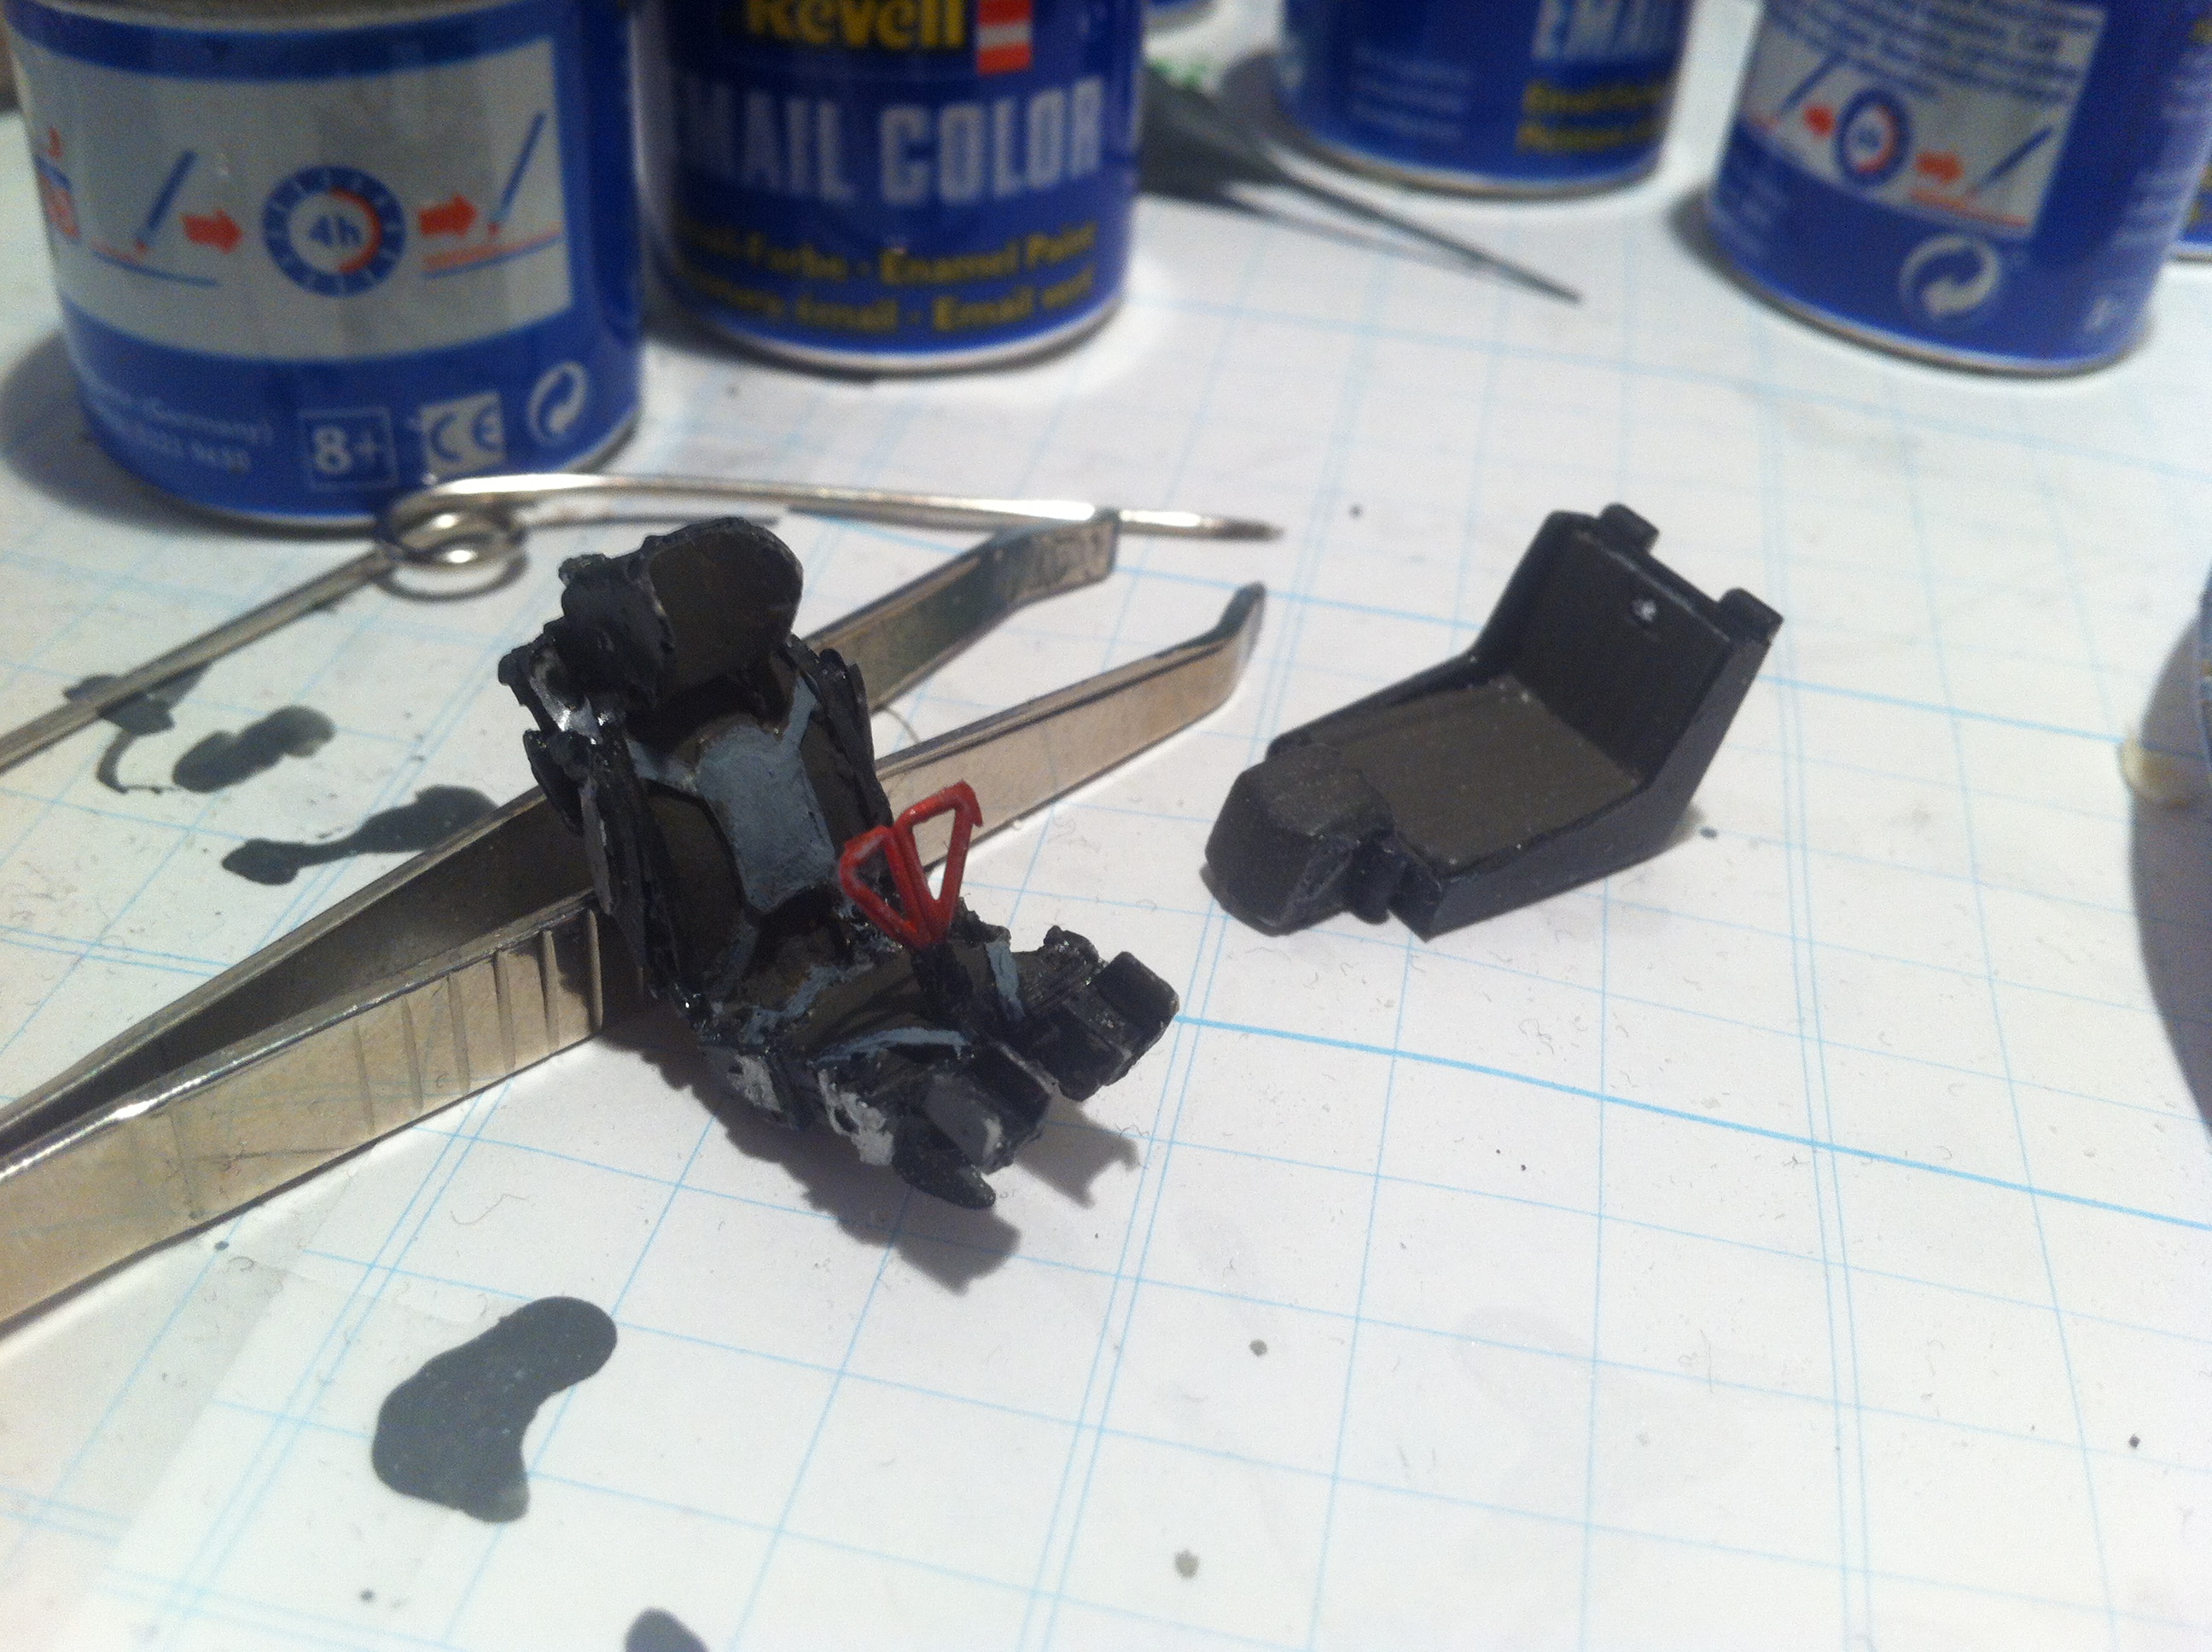
Realistic cockpit seat for MiG29
Ok, this one was a shame, the vanilla from Academy was a joke, I was able to survive the cockpit instruments after a little more touch with correct painting, but the seat was super-ugly and very basic. Just compare the below model seat and the MiG-29 K-36DM ejection seat.
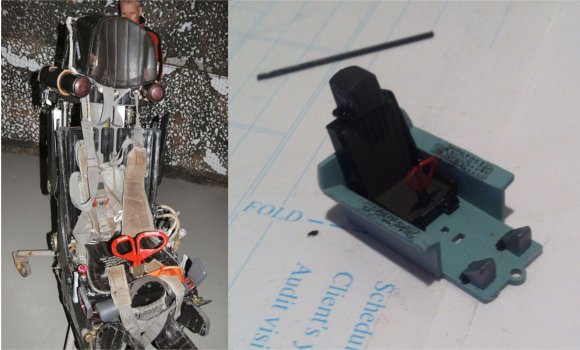
And this is the seat I managed to buy on ebay as a replacement, it took another 6,5Euro, but is MUCH nicer to look at.
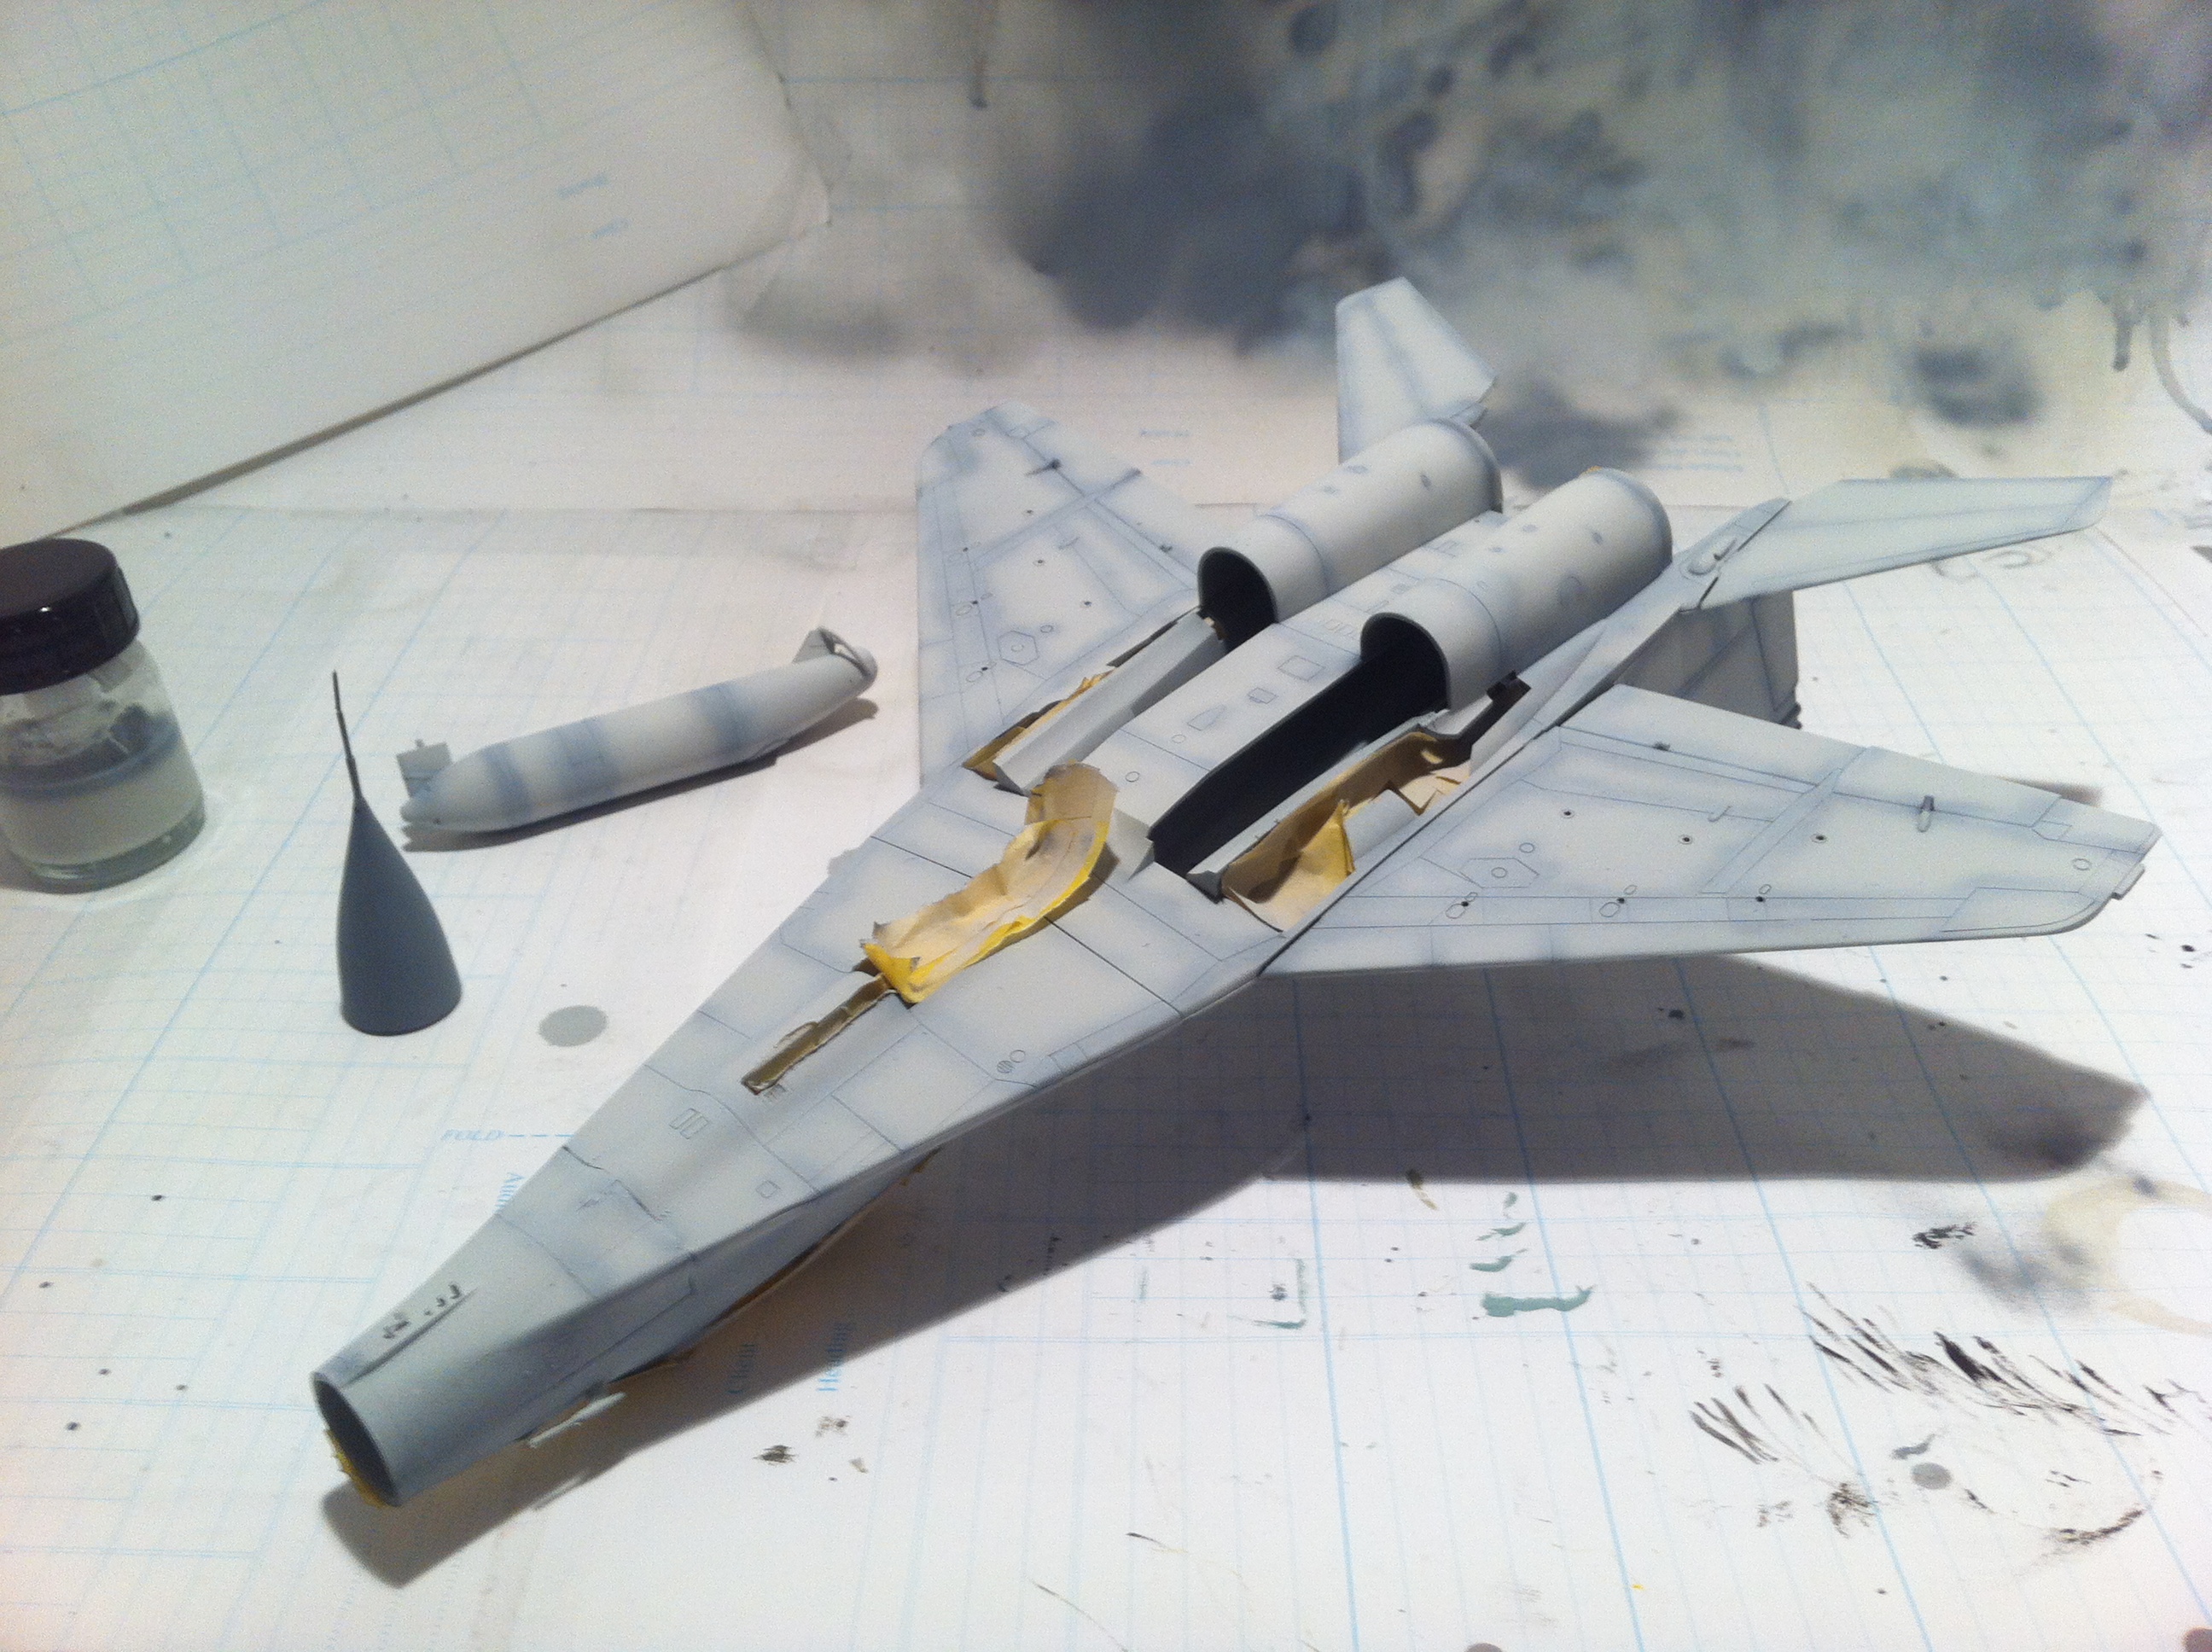
Pre-shading technique
The second big step was that I used a pre-shading technique in order to make the paint look more natural. This is done in three steps.
Step 1) use fully white, but thin layer of white color to make a best base color (to create contrast with dark shading later).
Step 2) Then make all the lines where big parts of “metal” join on the plane to simulate areas where the paint would be naturally weathered down.
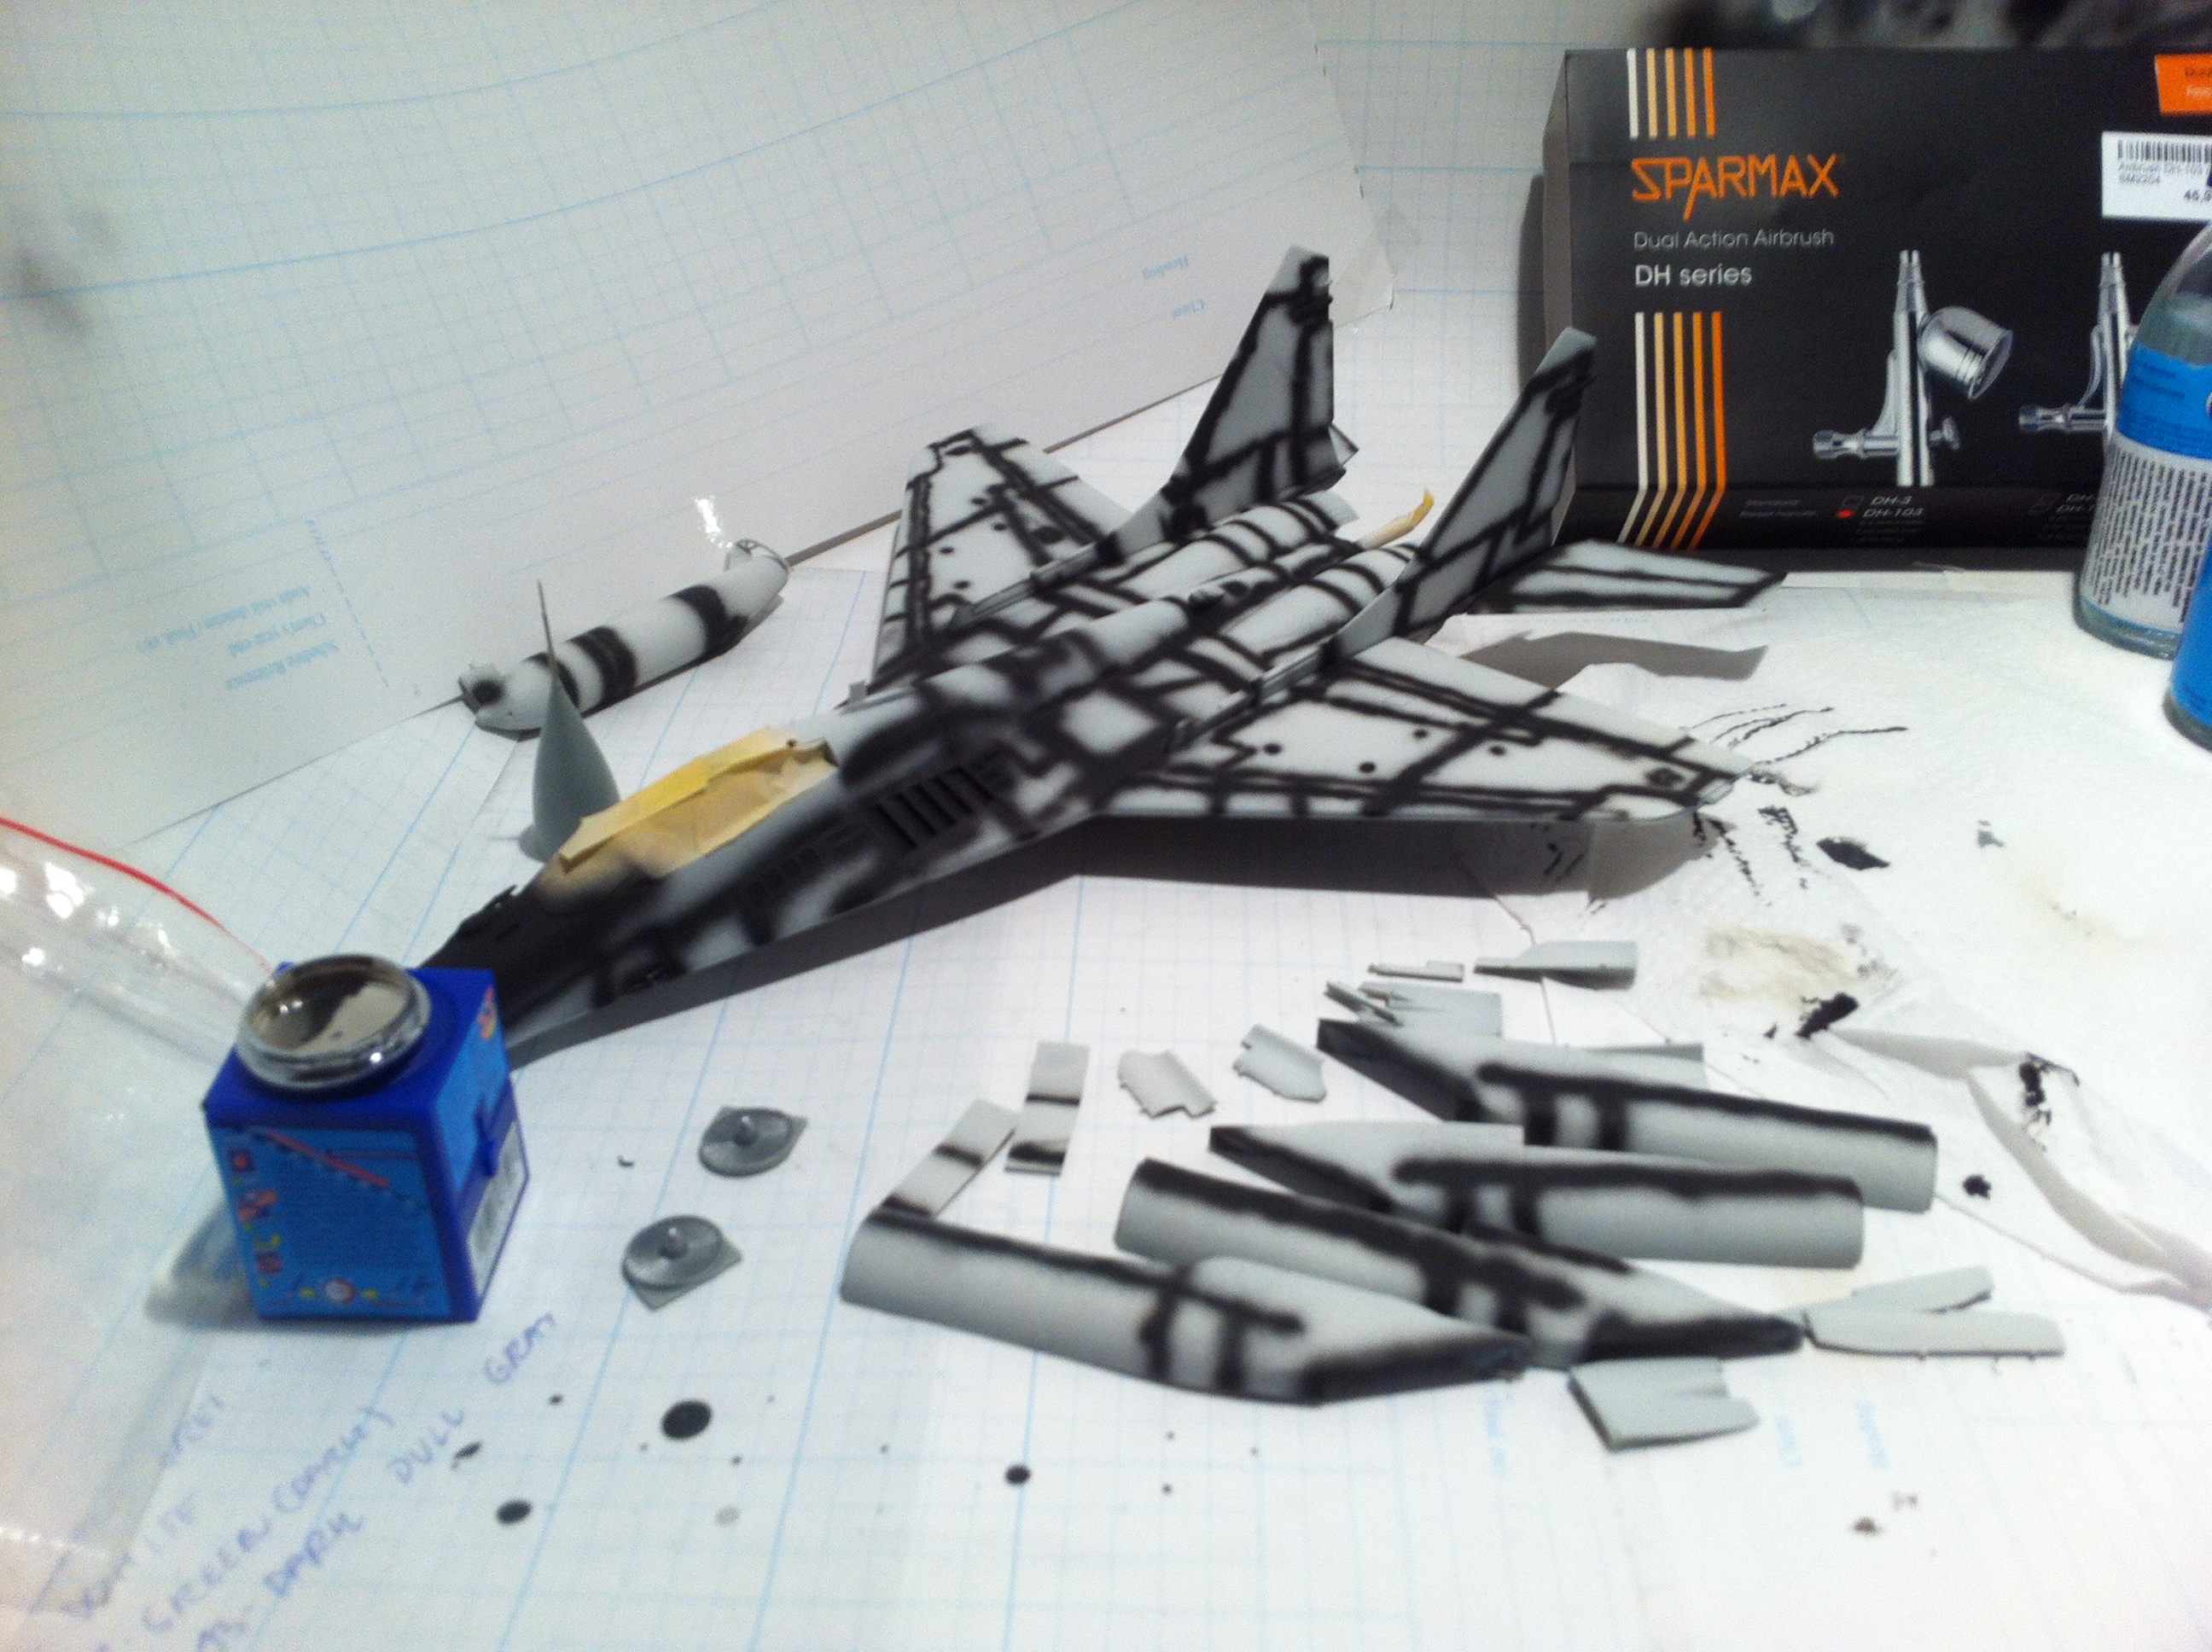
Step 3) Then use thin layers of color that is the base color of the plane. This is the hardes part because you cannot spray too much color or you will destroy the pre-shading by completely covering the contrast of white/black in the below layers.

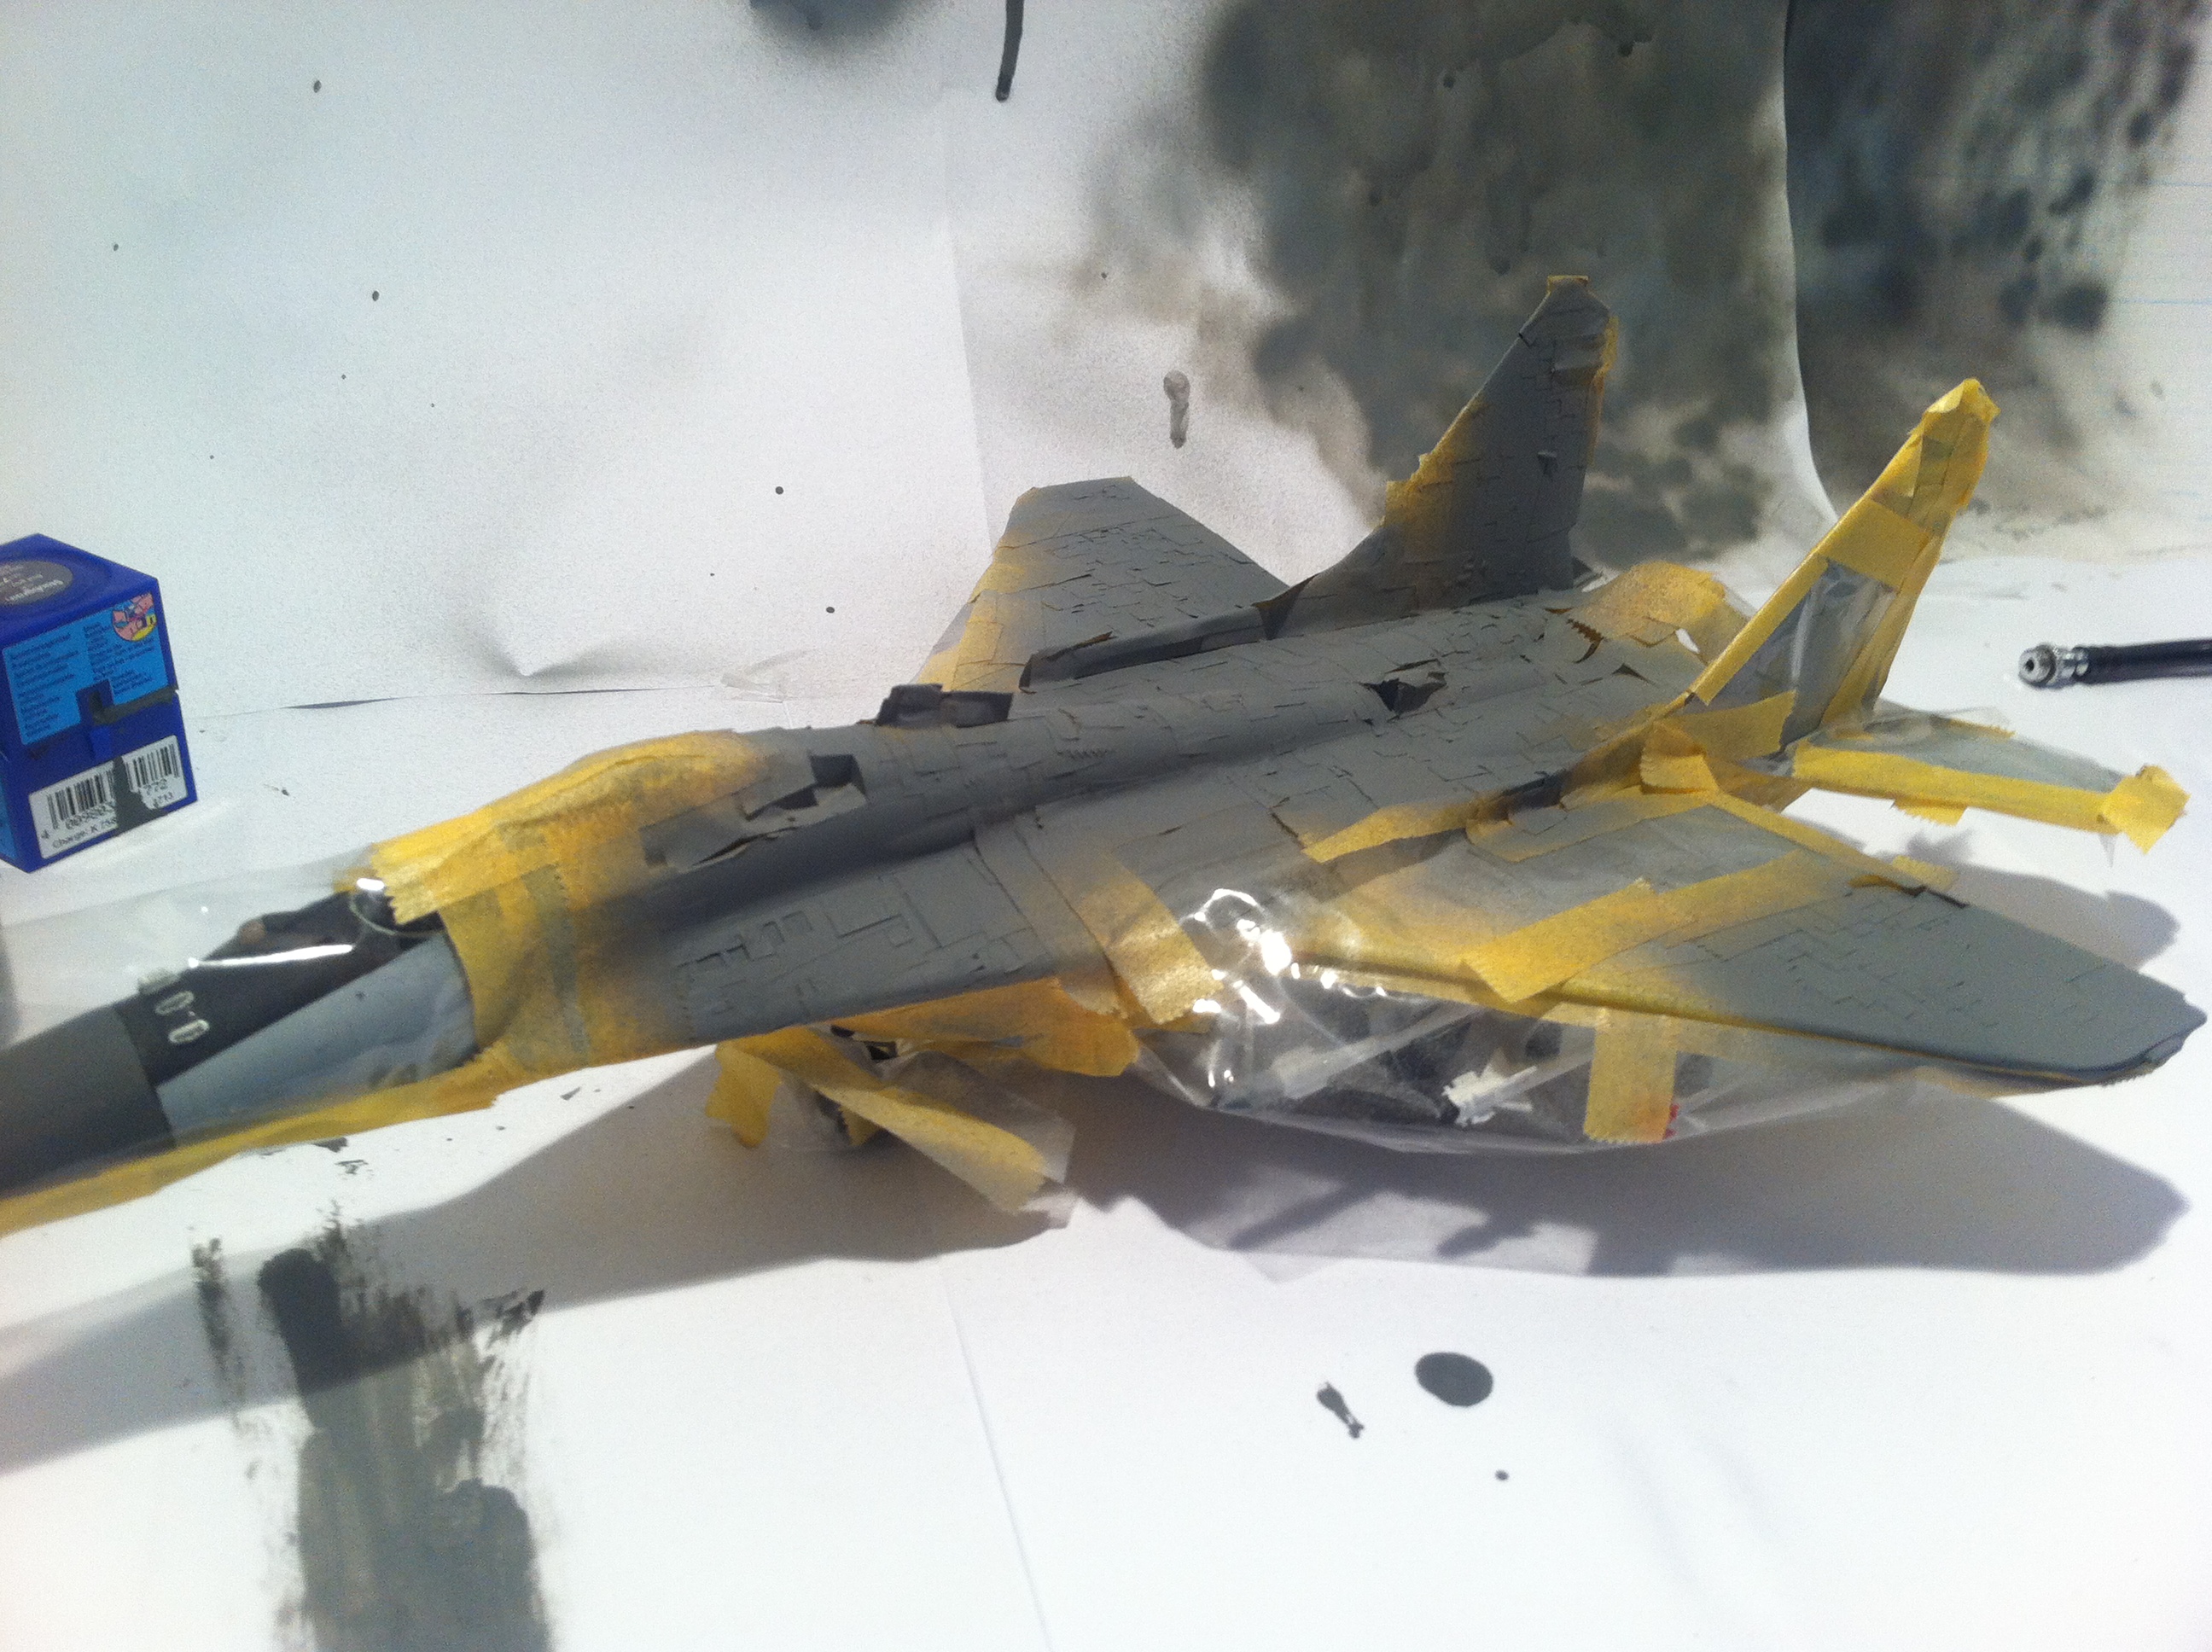
Digital camouflage using Air Brush (ignoring vanilla water decals)
Now the last, the most hardest and time consuming part of the whole model was the digital camouflage. First I have tried using the provided vater decals that looked decent at first glance, but were proven to be the most unrealistic of all possible options.

So I have decided to throw them away and simply do the whole digital camouflage manually with masking tape and AirBrush 🙂 It took me more than 7 evenings (about 5 hours each) in the course of last 4 weeks, but the result is absolutely astonishing.


And it turned out beautiful! After the digital camouflage was done, I as literally afraid to touch the plane not to break anything or melt the paint with sweat on my fingers. Following this phase I still had to spent another 6 to 8 hours finalizing details like antennas, canopy cover, lights and adding the remaining decals and then it was finished. So just to summarize again, one final photo.
Summary
So here it is, the most complex and both time and resources expensive model I built so far. After this one I plan to put this hobby to rest for a while. The reason is that a larger amount of work comming from my main job basically left me in the last months drowning in work and building this model was the only time to relax for me. All other projects or technical articles were on hold, so in the next weeks I plan to resurrect some of them.
I hope you liked the pictures, I admit it is now 6th day since I finished the model and I am still staring at it and cannot get enough of it :).
PS: I have one more model waiting in closet to be built (I got it as a present), but I really have to boost my effort in technical and carrier areas first, then I can return back to this for another mindless recreation.