


[minipost] Protecting SSH on Mikrotik with 3-strike SSH ban using only firewall rules
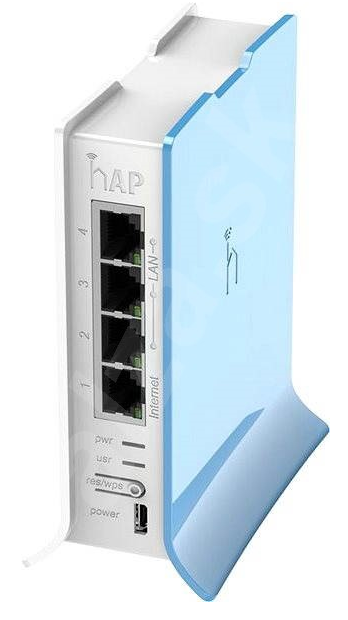 After working with Mikrotik / RouterBoard routers for a long time, I recently needed to replace an aging old wifi router at my parents and the recent brand of very cheap Mikrotik WIFI integrated routers (RB941-2nD-TC shown on left) that you can get under 20,-EUR was a great deal with an added bonus that I want to manage all this remotely and not visit physically every time there is a wifi problem. So following my previous post on how to put a little script into Mirkotik to email you it’s public address whenever it changes (a mandatory to manage parent’s home router using dynamic public IP from ISP) I was also concerned about publicly opened SSH port and wanted at least basic protection on it. Most of you are probably using already some great tool such as fail2ban on linux, that scans log files and if it notices three bad logins to SSH from an IP, it will put the IP into a blocking filter on the local linux iptables firewall so it can no longer harass your system. Well I needed something similar on my home Mikrotik router/firewall, but without impacting its performance or doing a lot of scripting. So I put together a quick “3-strike and you are blocked” firewall system using nothing but MIkrotik’s address listing feature.
Here is a complete example of 5 rules that you can place to your firewall rules (you have to understand the rest of your own rules, this is not a complete ruleset!!):
;;; BLACKLIST DROP
add chain=input action=drop in-interface=ether1 \
src-address-list=BLACKLIST  comment="BLACKLIST DROP"

;;; BLACKLIST CANDIDATE 3 - final strike
add chain=input in-interface=ether1 action=add-src-to-address-list \
address-list=BLACKLIST address-list-timeout=2w \
connection-state=new protocol=tcp dst-port=22 src-address-list=BLACKLIST_CANDIDATE_2 \
comment="BBLACKLIST CANDIDATE 3 - final strike "

;;; BLACKLIST CANDIDATE 2
add chain=input in-interface=ether1 action=add-src-to-address-list \
address-list=BLACKLIST_CANDIDATE_2 address-list-timeout=30s connection-state=new \
protocol=tcp dst-port=22 src-address-list=BLACKLIST_CANDIDATE_1 \
comment="BLACKLIST CANDIDATE 2"

;;; BLACKLIST CANDIDATE 1
add chain=input in-interface=ether1 action=add-src-to-address-list \
address-list=BLACKLIST_CANDIDATE_1 address-list-timeout=30s connection-state=new \
protocol=tcp dst-port=22 comment="BLACKLIST CANDIDATE 1"

;;; Allow SSH connections from outside, bude do blacklisting
add chain=input action=accept protocol=tcp in-interface=ether1 dst-port=22 \
comment="Allow SSH connections from outside"
Now let’s go through it with some description, well if you are a little bit firewall friendly, you might have already understood the point, but here is a quick logical explanation.
- First rule at the top is a simply block of everything that is in the “BLACKLIST” list, which is empty right now so nothing is happening yet.
- Second rule is actually the last strike rule that adds source IPs to BLACKLIST if the IP is already in “BLACKLIST_CANDIDATE_2” list. These candidate lists are a simply way to keep track of which source IPs are already having 1 or 2 strikes. Also notice that source IP is going to BLACKLIST list with timeout of 2 weeks, so it whoever will abuse the SSH will be blocked for 2 weeks on SSH port.
- Third rule is an intermediate rule that puts source IPs to candidate list 2 if they are already in candidate list 1 and they make one more SSH conncetion.
- Fourth rule is creating first candidate list 1, if a new SSH connection arrives.
- Fifth rule is simple allow of SSH access, please note that this rule is not special in any way because the blacklist protection is already done on rule 1 above, so nothing blacklisted will ever arrive here.
NOTE: The overall sequence of these rules is setup in this way so that source IPs are not double-added to any candidate list, that is why the rules seem to be in “reverse” order for a human logic.
Results & summary
If you setup these rules, get some external SSH client and try to open SSH sessions and check address list content after every attempt. On first try you will see your source IP in candidate list 1 like this:
[admin@MikroTik] /ip firewall address-list print
Flags: X - disabled, D - dynamic
 #   LIST                         ADDRESS           TIMEOUTa
 1 D BLACKLIST_CANDIDATE_1        81.4.124.59       29s
After second attempt (you have to make the second attempt in 30seconds after the first one) you will see this:
[admin@MikroTik] /ip firewall address-list print
Flags: X - disabled, D - dynamic
 #   LIST                         ADDRESS           TIMEOUTa
 1 D BLACKLIST_CANDIDATE_1        81.4.124.59       26s
 2 D BLACKLIST_CANDIDATE_2        81.4.124.59       29s
And your last, e.g. third SSH attempt will fail because you will get to BLACKLIST and your TCP session will get starved, and of course your source IP will be on the BLACKLIST
[admin@MikroTik] /ip firewall address-list print
Flags: X - disabled, D - dynamic
 #   LIST                          ADDRESS          TIMEOUTa
 1 D BLACKLIST_CANDIDATE_1         81.4.124.59      20s
 2 D BLACKLIST_CANDIDATE_2         81.4.124.59      22s
 3 D BLACKLIST                     81.4.124.59      1w6d23h59m54s
So in summary, this is a simple, yet powerful protection against SSH bruteforce bots that are trying to access even your home rotuers. The only disadvantage of this system is that it doesn’t differentiate between successful SSH and failed SSH logins, so even if you yourself accidentally open more than 3 sessions under 90 seconds you can get banned, but honestly that is not often the case for connecting to your home router.